
Create a design copy
To begin, you’ll want to visit the “ProPhoto > Manage Designs” screen in your ProPhoto software, and scroll down to locate the included Agency design. Click the Create New Design button to make a copy.
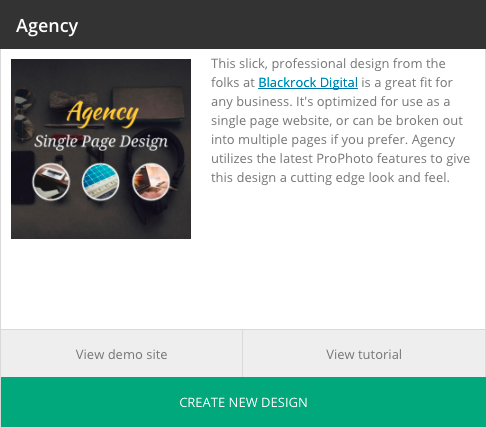
A popup will allow you to give your new copy a unique name and description so you can find it easily later. Click Copy and the new copy will be added to your other saved designs further up the screen. When you’re ready, click Customize to start working with Agency privately.
Customizing vs Go Live designUse the on-boarder
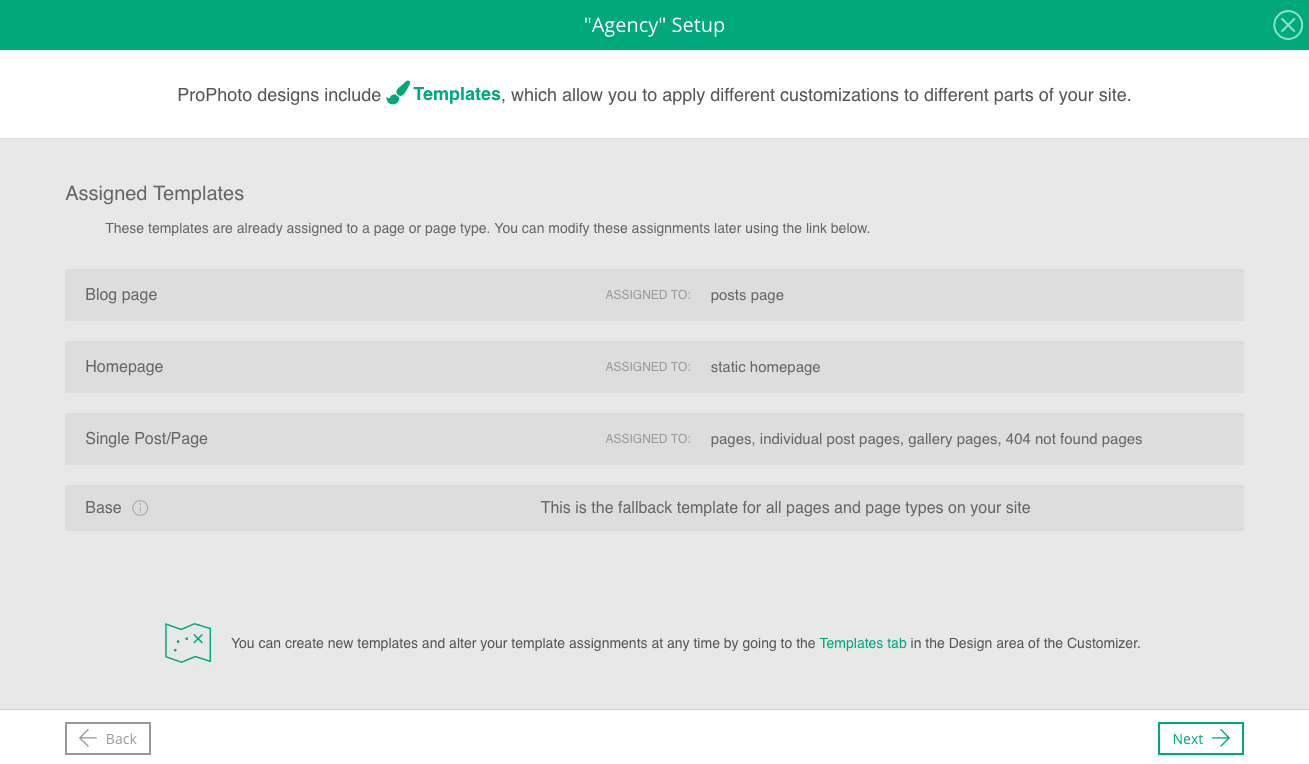
Use the ProPhoto on-boarding wizard to setup a design with the basics. When you activate the design from "ProPhoto > Manage Designs" (or when you click the Setup button in that screen) you will be guided through the setup of a few key items, including:- the front page for your WordPress setup
- assignment of ProPhoto templates to pages in WordPress
- linking of menu items to WordPress pages
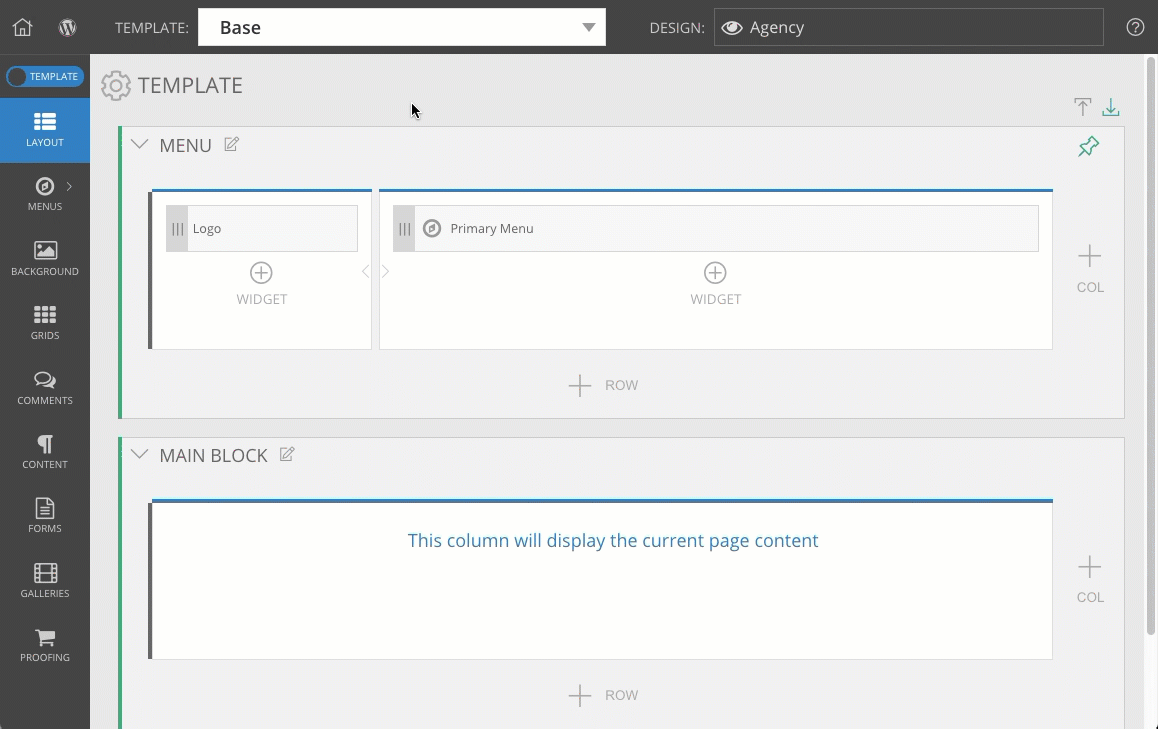
About the layout editor & templates
If you aren’t already familiar with the Layout Editor or how it works, you’ll want to learn a bit about it before you modify the Agency design. We have plenty of info in our Layout editor guide.
We also recommend learning about page Templates, since the Agency design uses them for different pages of your site. See our Designs & Templates guide for more information.
But, in general, Agency was created to behave as a ‘single-page site’ design. That is, your front page is made entirely in one template, and contains all the main sections of info for typical visitors in one page, including:
- A logo & menu area up top
- A large ‘welcome’ image and text
- An informative section about services/products
- A grid area linking to the recent posts on your blog
- An ‘about’ section for your business
- A ‘team’ section for bio info
- A ‘featured’ section for affiliates or other badges
- A contact form
In many cases, you may not have need for other pages of your site. But you’re welcome to create other WordPress pages and the Single Post/Page template will be applied to them.
Apply templates to style specific pages
Agency comes with a few core templates for the home page, the blog page, and the individual posts/pages you may have.
The On-boarding Wizard mentioned previously will not ask you to assign any templates to individual pages because the core templates are setup for you already.
You can assign templates to other WordPress pages any time – our separate Apply templates to pages guide has all the details.
Hide page content for certain pages
The content of each WordPress page will be seen by visitors, along with anything added in its ProPhoto page template. But some designs may create widget content inside page-specific templates, and have no need for the WordPress page content.
Agency creates page content with widgets in the home page, so the content of your page will probably be hidden for this special case. Make sure to edit your WordPress page and check the box to hide all page content, seen in this screenshot:
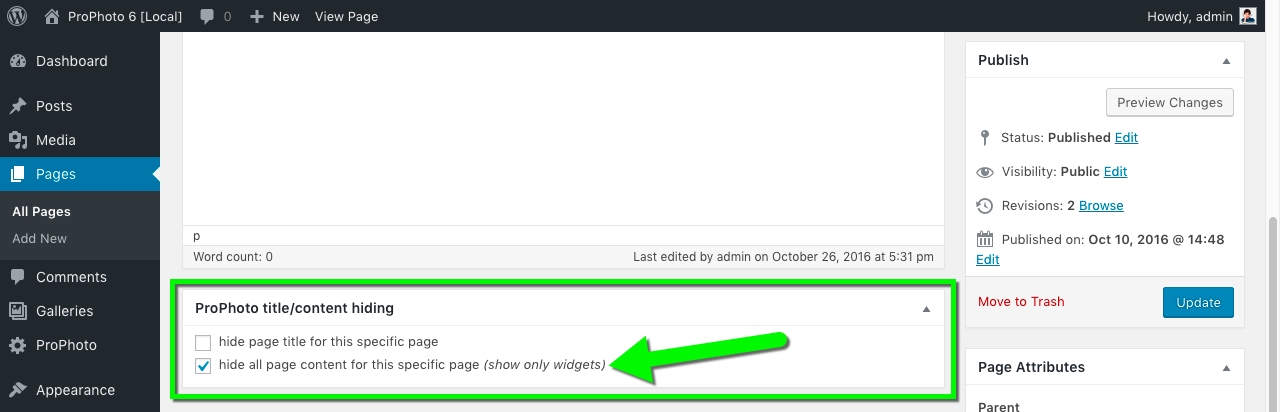
This way, only the template widgets will be seen, and any content you’ve put into the WordPress page will be unused, except to generate automatic SEO tags like description text.
Provide a featured image for blog posts
Since ProPhoto Grids create thumbnails from the content of your blog posts, you may want to review our Set a featured image guide.
You can provide a specific Featured Image in your WordPress post editor for use as the grid photo. Otherwise, the first image in your post or the first gallery image will be used for the grid thumbnail.
When you have blog posts with images, galleries, or a Featured Image, your own photos will be used to create grid thumbnails, demonstrated in this screenshot:
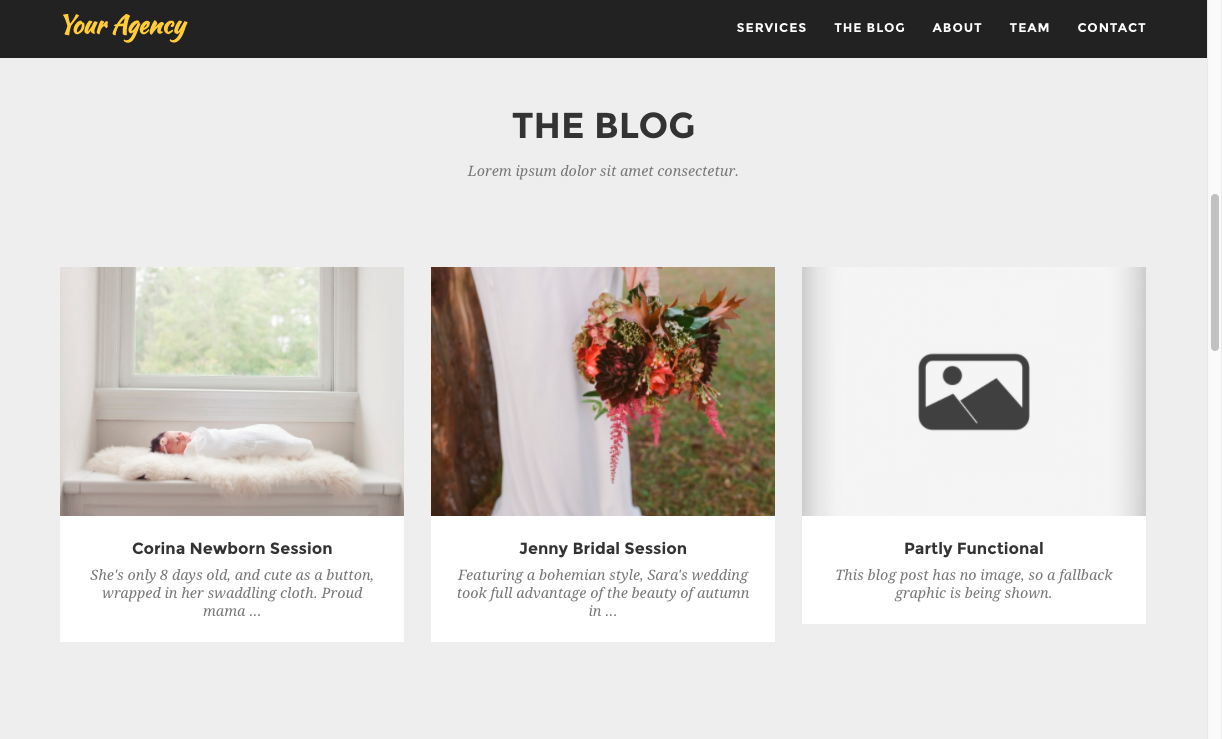
If a page does not include a Featured Image, your grid will try to use a photo from the content of the page, or from any ProPhoto gallery which appears in the page content. If neither of those can be found, a fallback image is used instead (from “ProPhoto > Customizer > Grids”), seen on the right side in the example above.
See our separate Grids guide for lots more information about styling and changing your grid appearance and behavior.
Personalize templates
At this point, it’s time to begin personalizing the front page with your own content.
The easiest way to do this is via the ProPhoto Bar – a special toolbar that appears via a link at the bottom left of the front end of your site. With that tool you can locate blocks, rows, columns, background images and widgets on the front end and with one click be directed to exactly where to edit that area in ProPhoto.
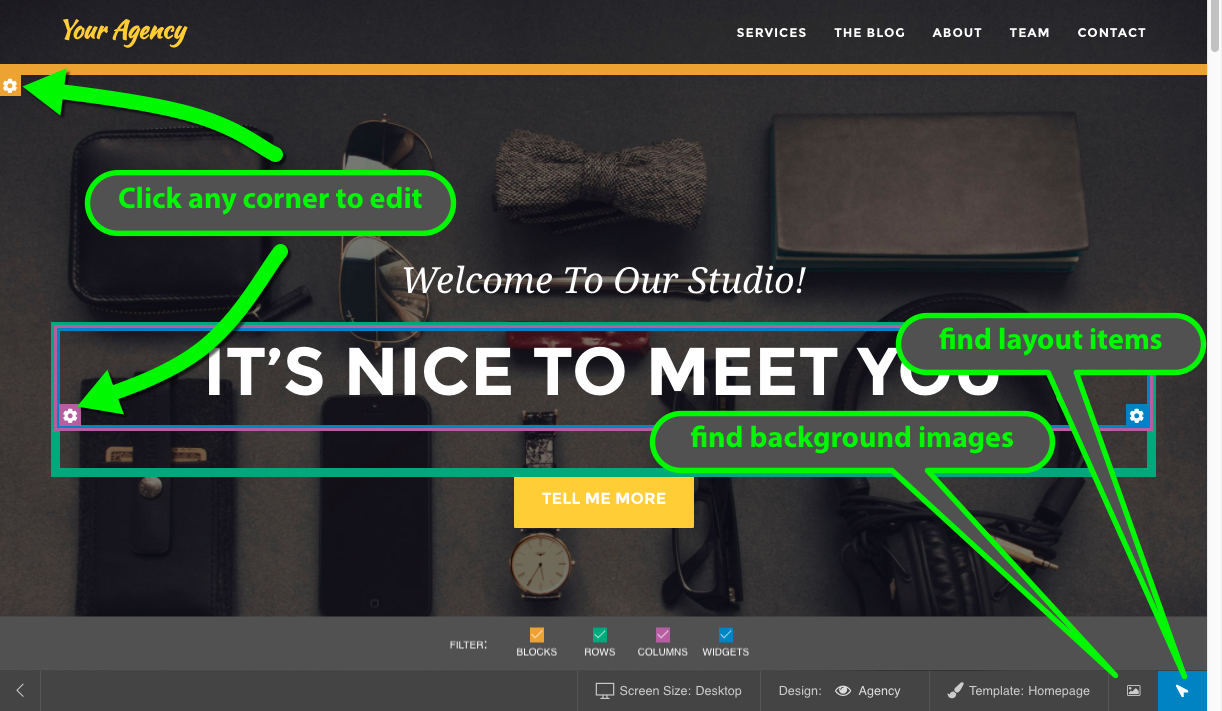
We recommend using this tool often when trying to find different parts of your design templates, so review our ProPhoto Bar guide if you haven’t already.
Edit graphics using tiles
Nearly all graphic elements in the Agency design are created as tiles, which are layered composites that feature images, text, shapes, animation, and other hover effects. These are some tiles used in Agency:
- the logo
- Tell me more button
- Menu button for tablets & phones
- disc graphics in the ‘about’ section
- social media icons
- bio images in the ‘team’ section
- …and more
Edit these tile designs by going to the “ProPhoto > Customizer > (toggle “Template” to “Design” at the top-left) > Tiles” area, demonstrated in this screen capture:
Select a tile design, and you’ll be able to edit text layers by typing in your own words, uploading your own image layers, and lots more. It’s a very flexible tool, so we recommend that you check out our Tiles guide for full details.
If you have questions about using different parts of your design, search this website for help, or contact us for guidance.


