
Create a design copy
To begin, visit the “ProPhoto > Manage Designs” screen in your ProPhoto software, and scroll down to the Sunny 2.0 design. Click the Create New Design button to make a copy.

A popup will allow you to give your new copy a unique name and description so you can find it easily later. Click Copy and the new copy will be added to your other saved designs further up the screen. When you’re ready, click Customize to start working with Sunny 2.0 privately.
Customizing vs Go Live designUse the on-boarder
Use the ProPhoto on-boarding wizard to setup a design with the basics. When you activate the design from "ProPhoto > Manage Designs" (or when you click the Setup button in that screen) you will be guided through the setup of a few key items, including:- the front page for your WordPress setup
- assignment of ProPhoto templates to pages in WordPress
- linking of menu items to WordPress pages
About the layout editor & templates
If you aren’t already familiar with the Layout Editor or how it works, you’ll want to learn a bit about it before you modify the Sunny design. We have plenty of info in our Layout editor guide.
We also recommend learning about page Templates, since the Sunny design uses them for different pages of your site. See our Designs & Templates guide for more information.
Create WordPress pages
When you used the On-boarding Wizard tool in the previous steps, you should have setup a front page for your site, instead of a blog of posts. You may also have created the pages for these included page templates:
- Portfolio
- Investment
- About
- Contact
If you don’t already have these WordPress pages and you want to use them for your website, create them in WordPress by going to “Pages > Add new” to create each one.
Apply templates to style specific pages
Sunny 2.0 comes with six separate templates. By default, the design will assign unique templates to your static front page, individual post pages, and your main blog page. But three other templates are provided for other specific pages.
The On-boarding Wizard mentioned previously will make it quick and easy to assign templates to pages, seen here:
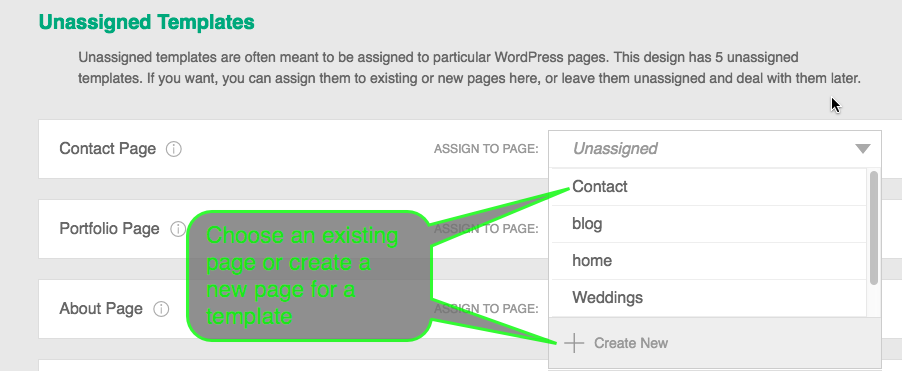
If you are just starting out with your site, you will create new pages to which you assign the unassigned templates. (Investment, Portfolio, About, Contact, Galleries)
If you already have pages you’d like to use, you can apply Sunny’s templates to your existing pages.
You can also assign templates to WordPress pages any time – our separate Apply templates to pages guide has all the details.
Hide page contents
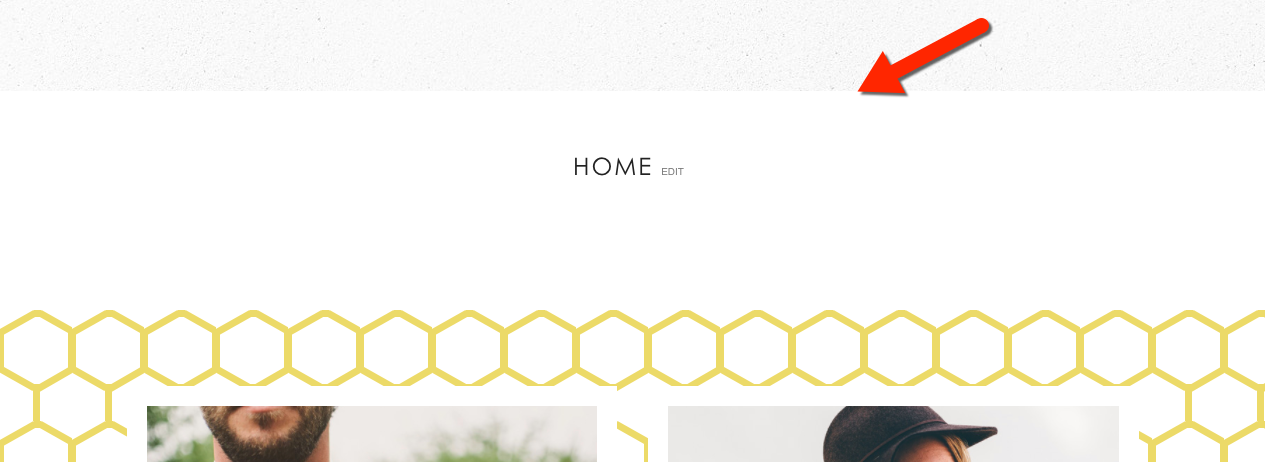
The content you see for a few pages in the Sunny 2.0 design does not come from the WordPress page content, but comes from specific page templates instead.
You’ll want to disable the home page title and white content area, seen here:
Edit the home page in your WordPress “Pages > All Pages” screen, and in the page editor, locate and check the box to hide all page content of the page, shown here:
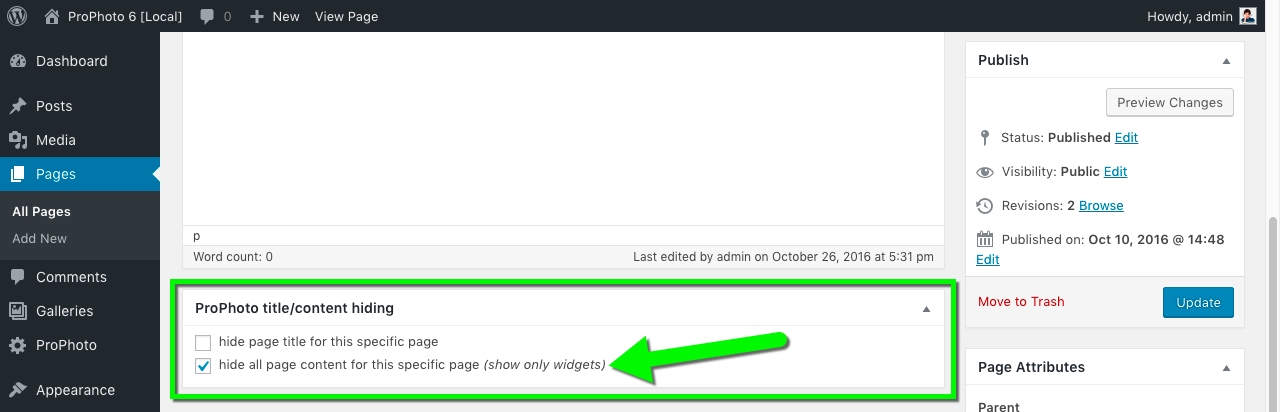 You can repeat this process for the other pages which are styled by Sunny’s templates:
- Investment
- Portfolio
- About
- Contact
This way, only the template widgets will be seen, and any content you’ve put into the WordPress page will be unused, except to generate excerpts in grids, and automatic SEO tags like description text.
Edit the front page sections
The front page features several details which are created by ProPhoto widgets in your Sunny Home Page template. To find each widget, you could go to “ProPhoto > Customizer > Layout” and select the template along the top of the screen. Then, you can locate each widget and edit the text or images.
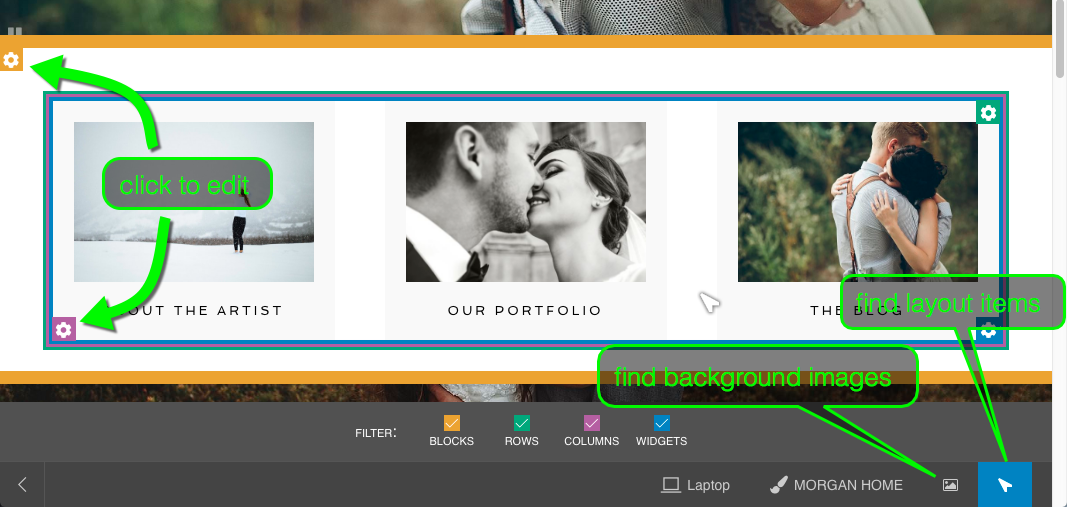
But a faster way to personalize any template is to use the “ProPhoto Bar” tool to link directly to any section or widget of your template, demonstrated here:
This is the fastest way to locate and edit the different parts of any ProPhoto template, so learn more in our ProPhoto Bar guide.
Then, use the same approach to find & edit parts of your front page, like the sections described in detail below:
Front page welcome message
As seen in the example above, you can find and edit the text of the ‘welcome’ message pretty easily using the ProPhoto Bar tool, but what about the color, font, and styling?
Click to edit the styling for your Sunny Home Page row which contains this widget. In the popup, choose the General Font Areas tab to assign Font Styles to the widget text appearing in this row, shown here:
You can assign a different font style if you prefer. Or, you can use the dropdown selector to create a copy of any font style and assign it exclusively to this row’s widget text.
Edit the original or copied font styles in the “ProPhoto > Customizer > (toggle top-left switch to “Design”) > Fonts” screen. You can apply a different font family, a different size, color, bold, italic, and lots more. For example, if you want to change the yellow color scheme of text, make the changes to the font styles and your changes will apply site-wide.
Learn more about working with text color & style in our Fonts & text styles guide.
Weddings, portraits, bio images & tiles
Now you know how to edit text widgets and font styling, but the front page includes a pair of images used to link to blog categories or profile pages:

… and also includes a bio section with an image on the left, seen here:
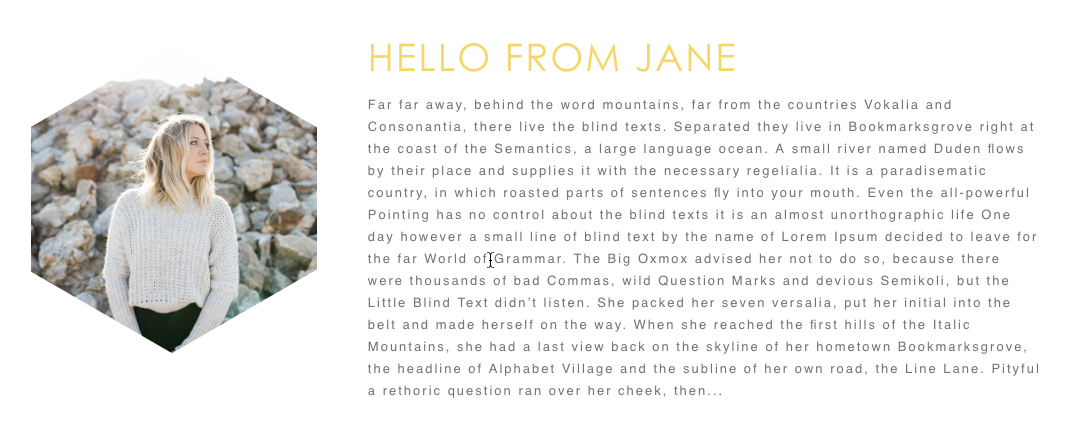
These are created with a special tool called tiles which allows you to create composite graphics made with text, image, and shape layers. You can even create hover & animation effects, like you see when you hover on the two weddings and portraits items.
To edit these images, and many other graphic items used in this design, go to the “ProPhoto > Customizer > (toggle “Template” to “Design” at the top-left) > Tiles” screen, shown in this video clip:
Select a tile design, and you’ll be able to edit text layers by typing in your own words, uploading your own image layers, and lots more. It’s a very flexible tool, so we recommend that you check out our Tiles guide for full details.
Pricing info section
The front page also includes three columns of pricing info, seen here:
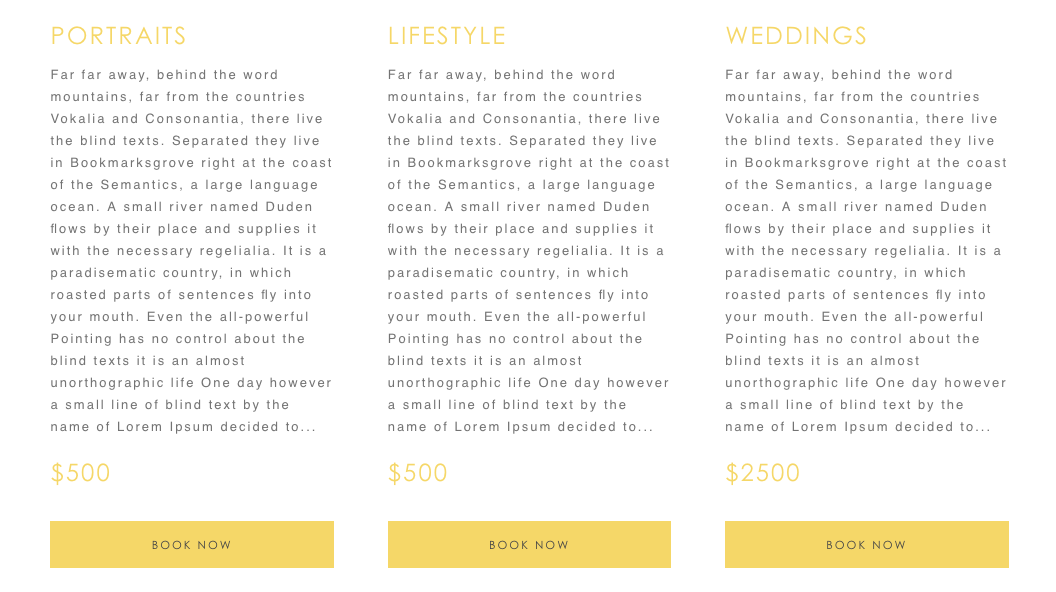
Now that you know how to edit text, font styles, and the tile used for each “Book Now” button, the last thing will be to turn each of these buttons into a link which takes the visitor to a booking page on your site.
Use the ProPhoto Bar to find and edit each of these three graphics widgets. When you’ve selected one to edit, scroll down to locate the Links to: box, and paste in your link:
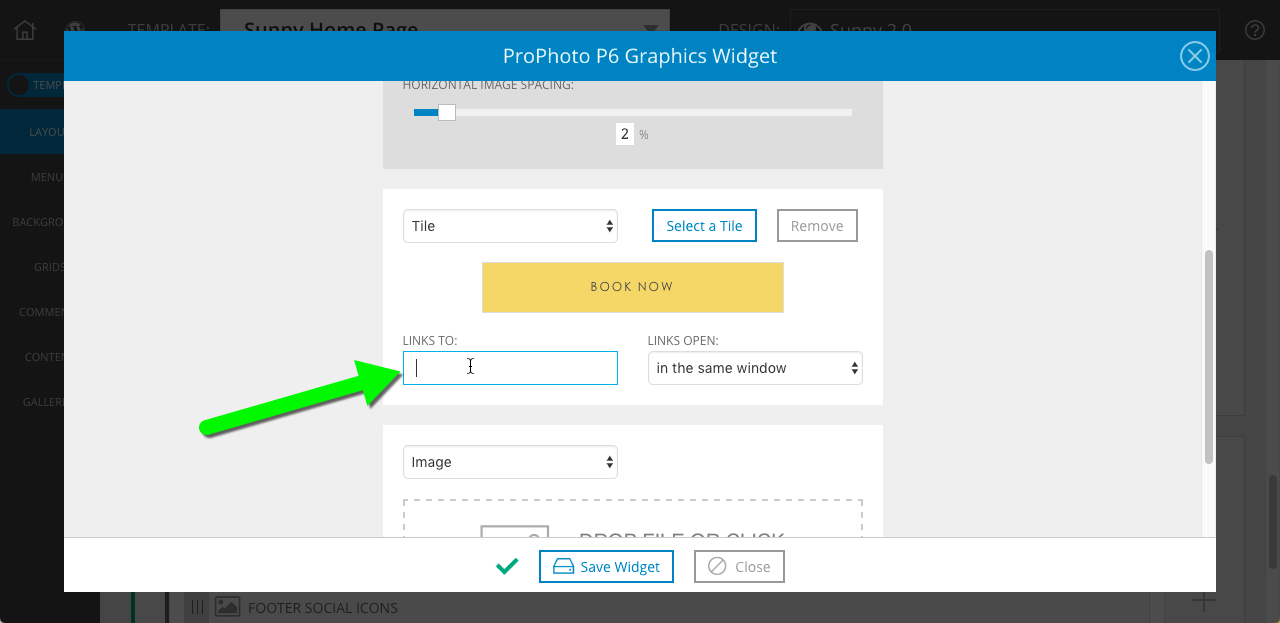
If you want to link to a page including a contact form that visitors can fill in, you can create a WordPress page and copy it’s URL address from your web browser while viewing that page. Paste the full URL into this box and click Save Widget. (remember to include the http:// portion for your link)
To learn more about creating and using a contact form, see our Forms
guide.
If you want to create a link which simply opens a new email, try using this kind of link:
mailto:myaddress@gmail.com?Subject=Booking%20Request
Of course, you will want to edit the email address to use your own, and you may want to modify the example subject line used here. When creating a subject line within a ‘mailto’ link, make sure to include the special %20 code for each space character in your subject line.
And if you want to link this button to any other website or booking service online, simply paste any other URL into the box.
Honeycomb background image
As seen above, the weddings and portraits buttons appear with a yellow honeycomb background, which you can replace with any other image. To locate it, try using the ProPhoto Bar tool again – it has a background image finder which you can use to locate the graphic and replace or edit it, shown in this video clip:
If you want to modify the color of this yellow honeycomb, right-click the image in the popup and save as… to your computer. You can modify it and upload your new version to replace it. Or, you can upload any other graphic or image to appear behind this section of the page.
For more info about working with background images, see our Background color and image guide.
Edit the Sunny logo
As explained in previous steps, you will use the tiles features in ProPhoto 6 if you want to edit the original Sunny logo. Find it in the “ProPhoto > Customizer > (toggle “Template” to “Design” at the top-left) > Tiles” area, and select the “Logo” tile design.
![]()
You may change the color of the layers, edit the text, apply different font styles, and adjust the sizing of the logo to fit your text. See our Tiles guide for much more info.
But if you do not want to use a tile design at all, but have your own logo image to use, you do not need to work with the tiles tools. Instead, edit the Sunny Base template and find the graphics widget which inserts the logo. Switch it to use an Image instead of a tile, and you’ll be able to upload your own logo image.
![]()
Using an image will eliminate the cool hover effect which changes the logo background from yellow to white, so if you want to keep this behavior, try editing the logo tile design and add an image layer which uses your logo as a PNG with transparency.
Footer area
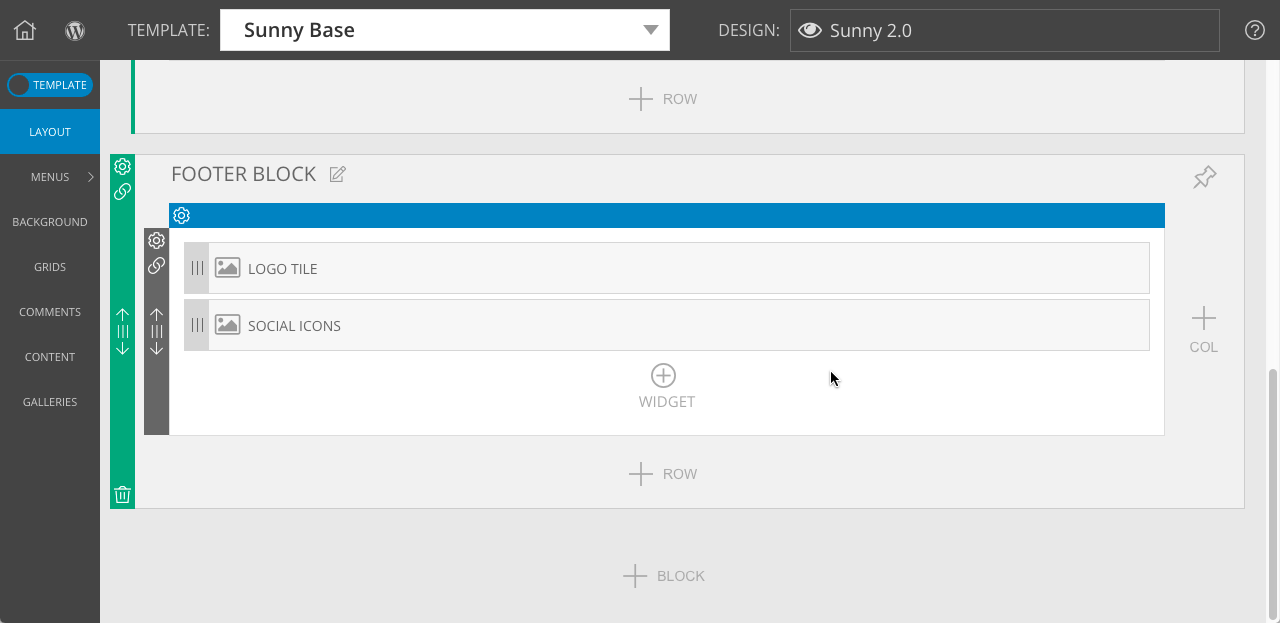
Below all your page content is a prominent footer area which features a logo and four social media buttons for Facebook, Twitter, Pinterest, and Instagram.

Since this is a major part of all pages, you’ll find it in your Sunny Base template, in a block titled FOOTER BLOCK. Two graphics widgets are found in the row, with the first containing a special version of the logo tile design we looked at earlier (without the hover color effect), and the second contains all four social media items.
Edit these widgets to link to anything you want by clicking to edit the Graphics widget where you can paste in URL link addresses to your social media pages, where you can add or remove buttons for your social media pages, or where you can change the graphic used for each.
To modify the original tile designs (for example to change the original yellow color or the text) find each tile design in the “ProPhoto > Customizer > (toggle “Template” to “Design” at the top-left) > Tiles” area, mentioned in earlier steps.
Background color
To change the default yellow background color, be sure to work with the Sunny Base template, mentioned above. Edit the FOOTER BLOCK customizations where you can edit the Background color and image settings, as demonstrated here:
Remember, if you change the background color of the footer, you may also need to edit the logo to use a matching color – it’s a good idea to copy the color value in this background color area to your clipboard so you can paste it as the color in your tile design.
Edit special pages
The Sunny 2.0 design comes with a few special page templates by default, which you’ll want to personalize:
- Investment
- Portfolio
- About
- Contact
As mentioned earlier, the best way to find each part of your pages is to use the ProPhoto Bar. With that tool you can locate blocks, rows, columns, background images and widgets on the front end and with one click be directed to exactly where to edit that area in the backend.
We recommend using this tool often when trying to find different parts of your design templates, so review our ProPhoto Bar guide if you haven’t already.
Portfolio grid
The Portfolio page & template will not have anything interesting to see at first. You’ll need some photo galleries before you customize this page, so you may want to go to the “Galleries” area in WordPress and create your main photo galleries before you proceed. For example, the Lifestyle, Portraits, and Weddings galleries used by default – or any gallery name you want. See our Photo galleries guide for full details.
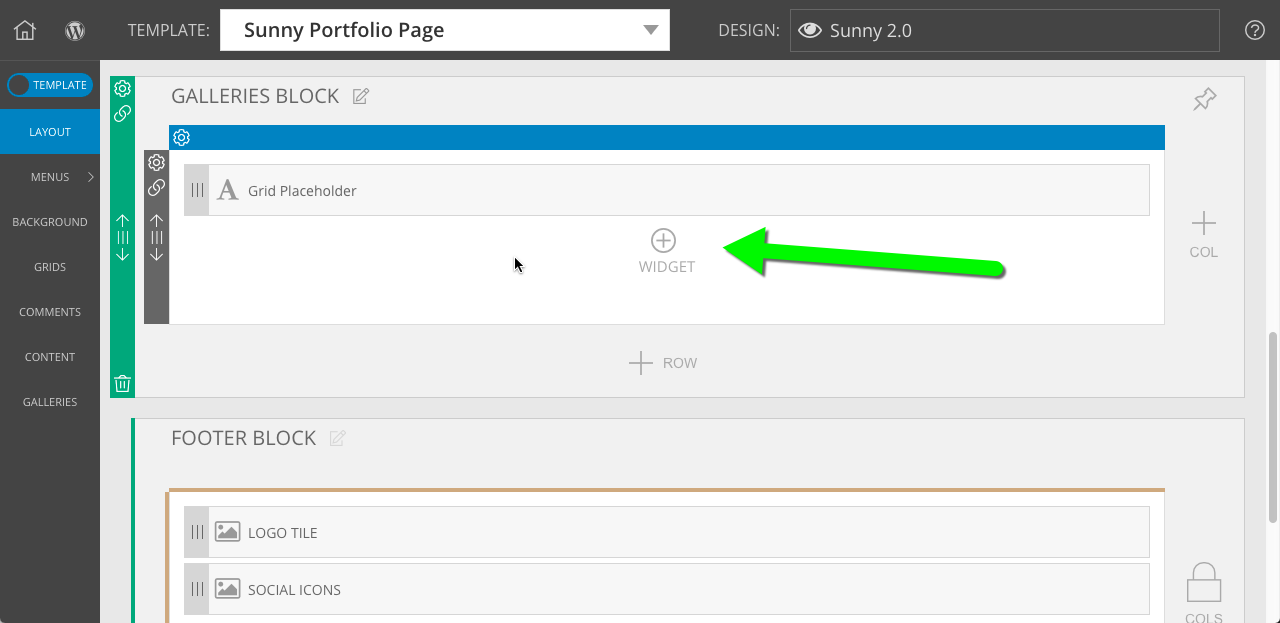
Once you have some galleries, edit your Sunny Portfolio Page template and locate the GALLERIES BLOCK section. You’ll click to create a new grid widget to link to your photo galleries.
Use these settings for your grid if you want to achieve the same style used in the demo setup:
- “Galleries” grid type
- “Overlaid text on roll over” grid style
- “cropped” grid layout
- image crop ratio = 1:1
- gutter = 20
- max columns = 3
- item min width = 200
- item ideal width = 300
- item max width = 900
Simply drag the grids you want to use from the left side to the right side of your grid popup, explained in our Grid widget guide.
Investment page
Similar to the Portfolio page explained above, the Investment page uses a page template to create the content and layout. Select the Sunny Investment Page at the top of your Layout screen and find the INVESTMENT BLOCK section. You’ll find several rows which have left & right columns of widgets.
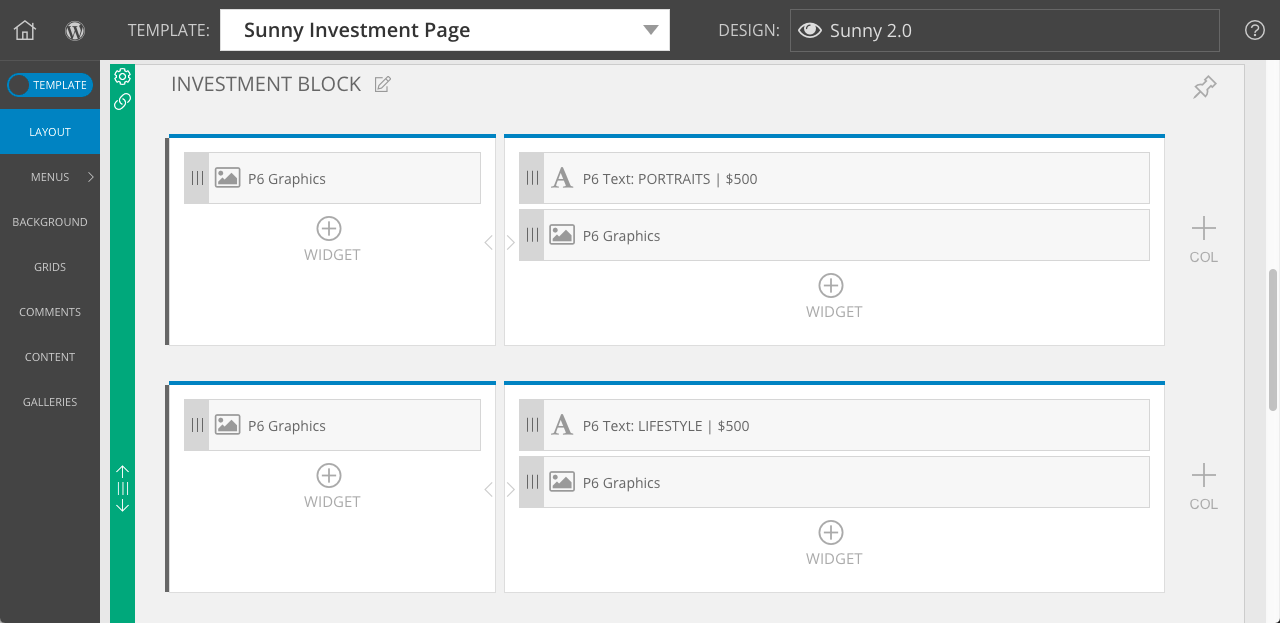
Edit the graphics widgets to upload your own photos on the left side. Edit the text in the widgets in the right columns.
As mentioned for the pricing section of the front page in earlier steps, you may want to modify font styles for your text, and you may want to edit the appearance or URL links for the buttons found in the right columns.
About page
Like the pages explained above, About has a Sunny About Page template to create the layout of images & text.
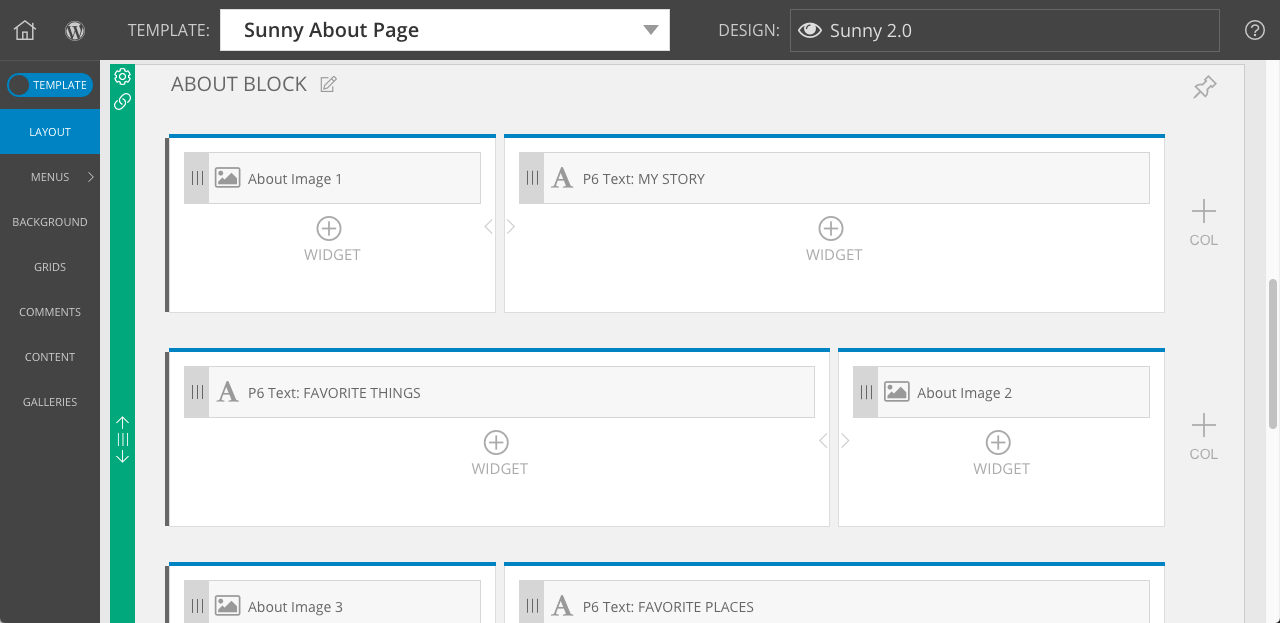
Each text widget contains the title and text, which you can easily edit with your own content.
Each of the images is created as a tile design to get the automatic hexagonal appearance. Edit your tiles in the “ProPhoto > Customizer > (toggle “Template” to “Design” at the top-left) > Tiles” area and select one to see how the image is cropped by overlaying white shapes on the corners:
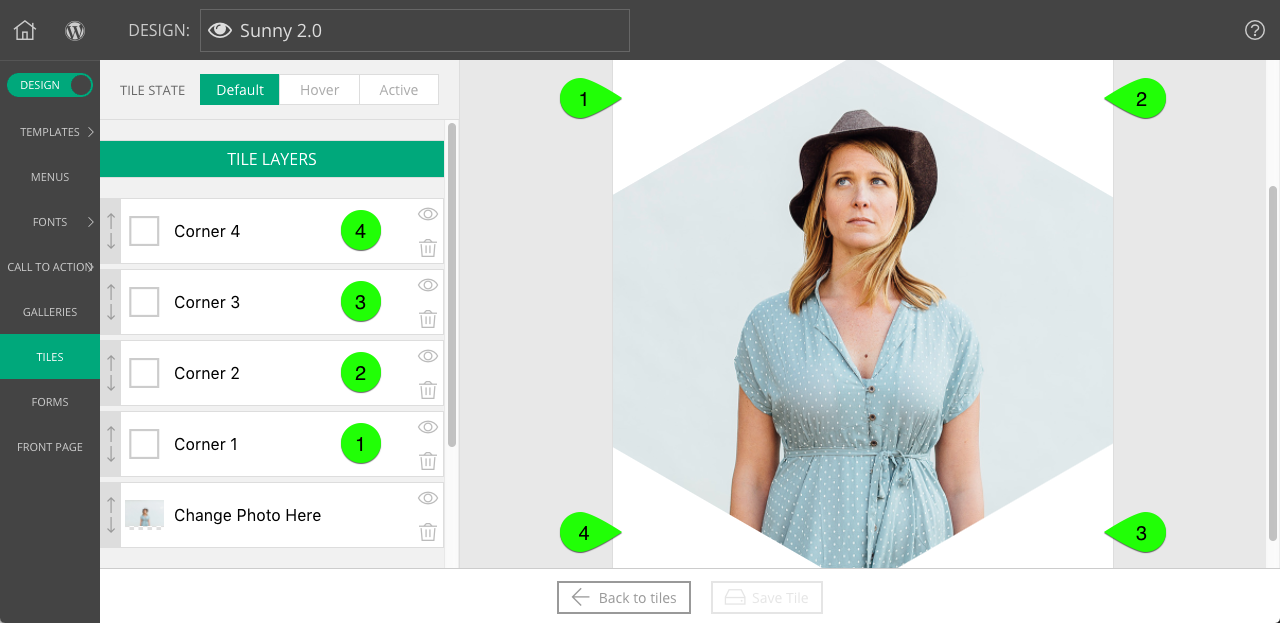
Simply upload an image into your tile design image layer, and the corners are taken care of for you. To learn more about tiles, see our Tiles guide.
Link menu items to pages
Sunny 2.0 comes with several menu items which must be setup to link to your WordPress pages.
The On-boarding Wizard mentioned previously will make it quick and easy to link menu items to pages, seen here:
You may also link to WordPress pages any time by going to the “ProPhoto > Customizer > (toggle top-left switch to “Design”) > Menus” screen. In this area, you can create new Page link items to your site’s pages.
If you have questions about using different parts of your design, search this website for help, or contact us for guidance.


