
When using the ProPhoto visual layout builder you will see your layout is made with a series of sections that are stacked down the page. Each section is called a “block” just like in the WordPress page editor. Also, like WordPress’ editor, you can create new blocks in a layout or you can reuse blocks in multiple layouts – e.g. to use a consistent menu/logo area at the top or perhaps a consistent footer area at the bottom of all layouts.
Inside blocks you will find content added with “module elements” which can add images, text, galleries, grids WordPress content, and lots more.
Blocks
Working with blocks in ProPhoto layouts is quite a bit more flexible than the WordPress block editor because you have greater control over block styling. Subdivide a block into horizontal rows and vertical columns, adjust backgrounds, borders, spacing, and nearly anything you can think of.
Block library
All of the blocks used by your ProPhoto layouts are collected in the block library found in the “Blocks” section along the left. Blocks are organized into groups of “In this layout” and “Not in this layout” and alphabetized for quick access:
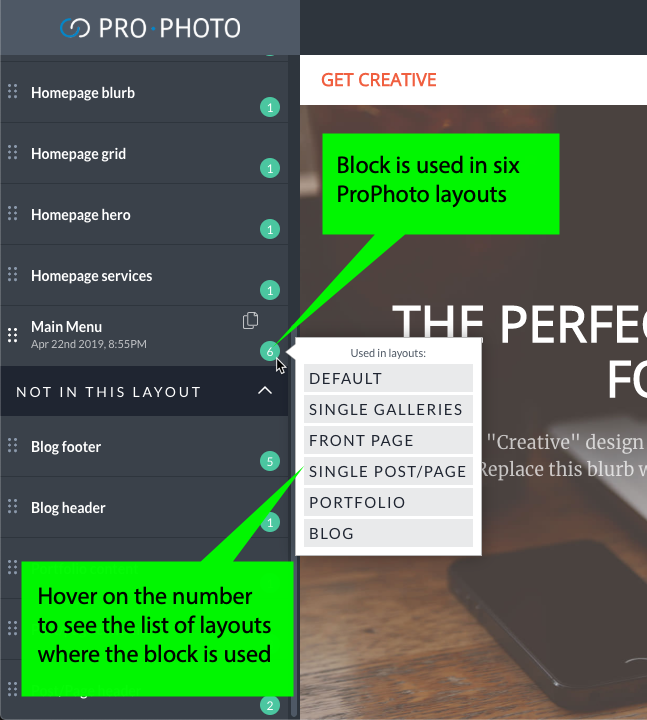
Blocks are listed alphabetically in each group with a number indicating how many layouts use each block. When you hover on the number a list of layout names will indicate which layouts are using the block, as seen here:
Blocks in your library can be copied/cloned with the copy button, and unused blocks can be deleted from your design.
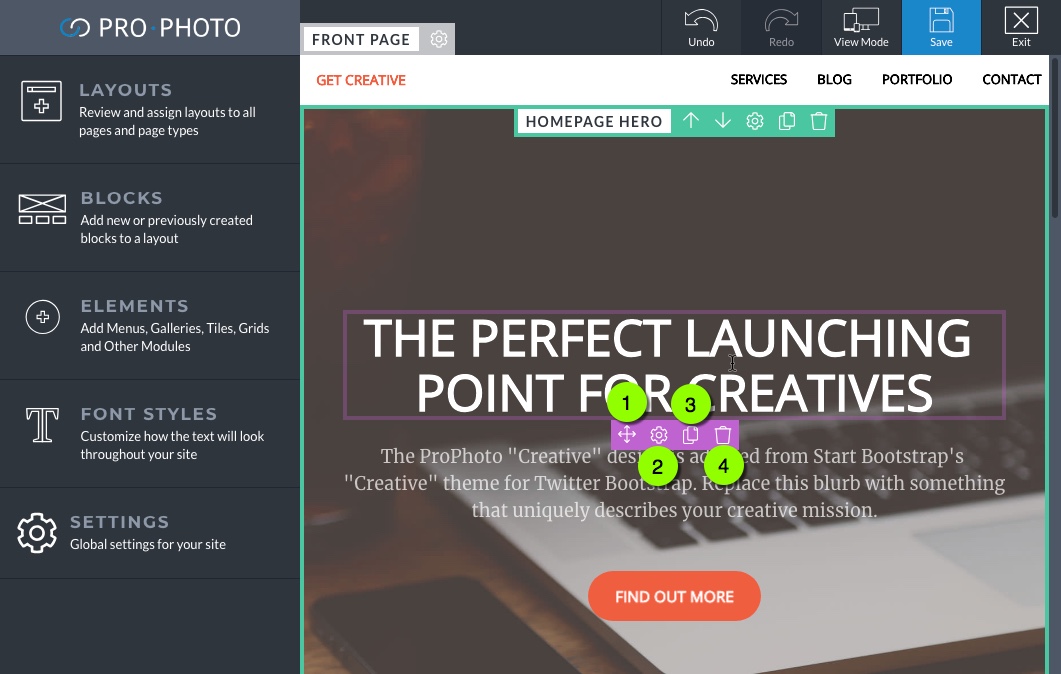
Block controls
Within the Visual Builder, you can edit all blocks and elements by hovering and clicking. Blocks are shown with either a gray or green outline as you hover on parts of your page layout.
- green block outline: the block is only used in the current layout and is ready to customize
- gray block outline: the block is used in other layouts and must be unlocked for editing
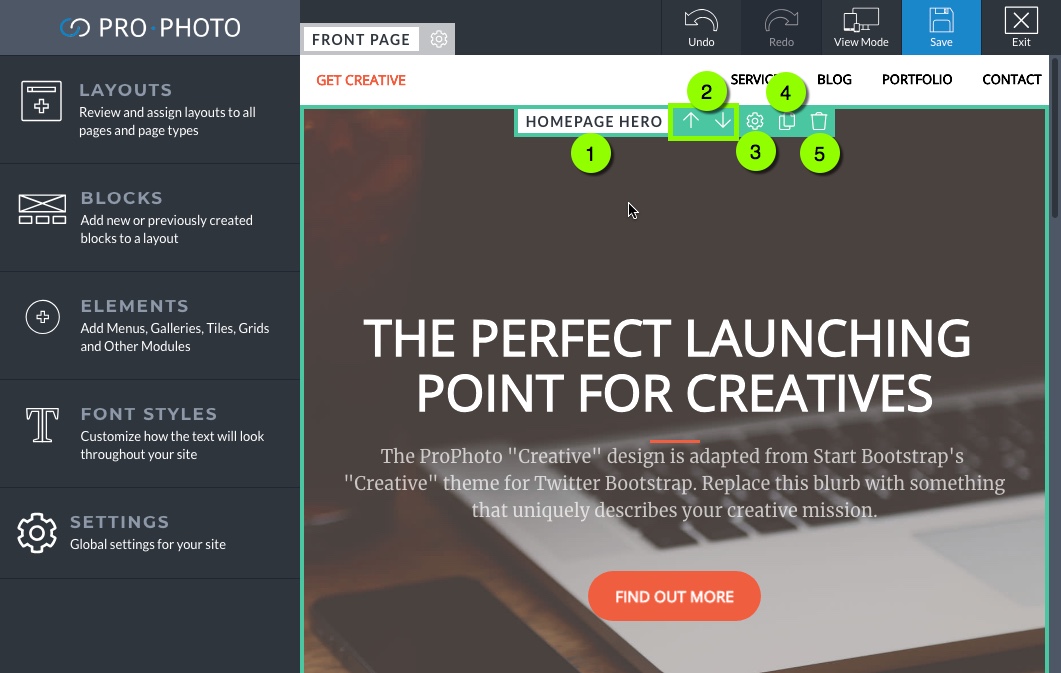
When you hover a block a control strip is shown along the top edge with these items:
- Block name – an identifier seen only by you in ProPhoto, and useful for labeling/organizing; edit by double-clicking a block name in the Blocks library to the left
- Up and down arrow buttons – moves a block up/down your layout stack
- Settings gear button – opens the customization popup where you can change settings, add and adjust rows and columns, and many more settings
- Copy button – clones the block with all of its settings, rows, columns, and modules; new copies are added in the Blocks library seen along the left in ProPhoto
- Trash button – removes the block from the layout; it will remain available in your Blocks library to the left for use any time
Unlock blocks for editing
If a block appears in multiple layouts you will notice it has a gray overlay & outline when you hover. You will see some buttons replaced with a lock button to prevent unintended changes that affect multiple layouts at once.
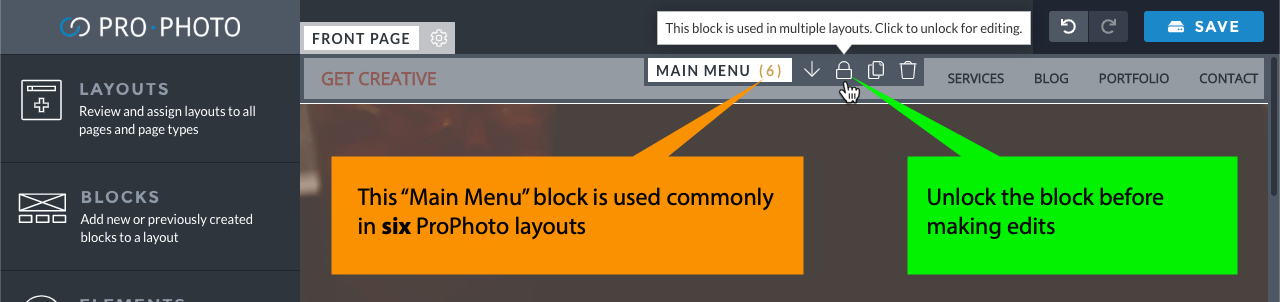
Click to unlock the block and you will be presented with two options:

- Continue – changes you make to the block or its content will be globally for all layouts which use this block
- Make Unique – a copy of the original block will be created and substituted in the current layout – changes you make will be unique to this layout
Remember that editing a block that is unique in one layout may still appear exactly the same for many pages of your website. If your ProPhoto layout is applied to many pages or applied to a page type, they’ll all have the same layout content you add in your blocks unless you use a WordPress content module. You can read our tutorial about applying layouts to pages to learn how to make copies of layouts which can be assigned individually to single pages.
Block, row, and column settings
The block settings allow you to adjust the appearance and structure of a block and its module content. Block settings appear grouped into two sections:
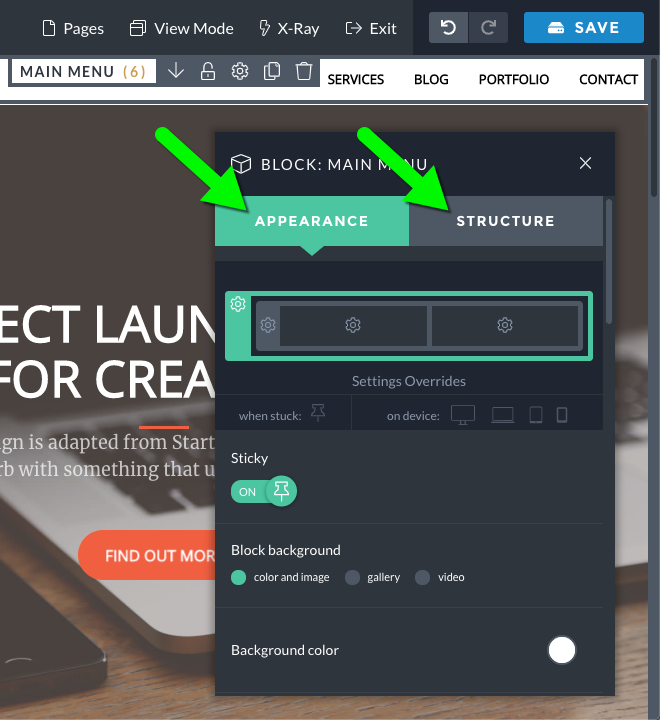
- Appearance – these settings allow you add a background color/image/gallery/video, grow and shrink padding, add borders, and lots more. Settings apply to the block or the rows and columns within the block
- Structure – these settings allow you to add, remove, reorder, and resize the rows and columns inside your block
Here is a demonstration showing the settings available in the two sections:
At the top of the Appearance tab you can click to select the block, rows, or columns – when you select one or more items, the settings will apply to that item.
Module elements
Similar to blocks, when you hover on a module within ProPhoto a magenta outline shows the edges of the module along with a control strip.
- Move handle – click and drag the module into a column of any unlocked block
- Settings gear button – opens the customization popup where you can change settings – many modules include alignment, spacing, and animation options
- Copy button – clones the module with all of its settings; drag the copy into your layout from the item appearing in the sidebar
- Trash button – delete the module from the layout; use the undo button or recreate a module if you have deleted it
Selecting or editing module settings may also display relevant items in the left sidebar when applicable, such as this example video where editing a menu module also displays the Elements > Menus structure for editing along the left:
There are many module elements available when you are working with your layout, so check out the Modules tutorial for further info and full details about each module element type.


