When it comes to spacing, remember that each layout item (block, row, column and module) appears layered on top of its parent. Sometimes you may find that it makes sense to add spacing on a child element like a row, and other times it makes more sense to apply spacing on a block.
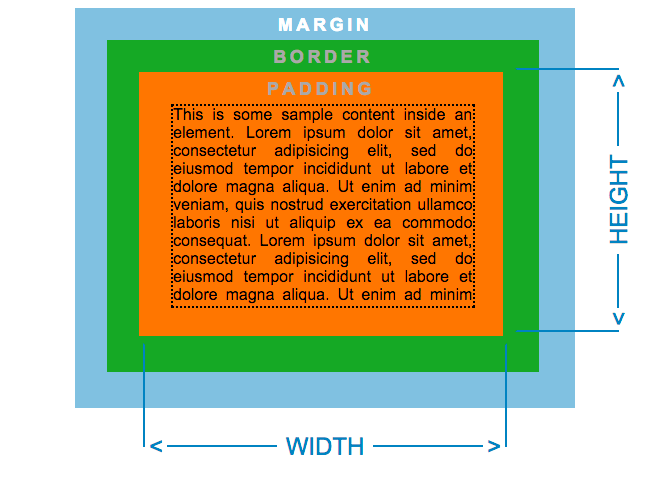
In websites, borders are added around an element as the name suggests, but there are two primary ways to add space around items – padding and margin. These two things behave differently, so review both in the sections below for details, as well as border options.
Padding
Think of padding as an inset for the content inside an element. Padding is used to add space inside an element – between the edge of the element and it’s content – without increasing the width or height.
padding is added inside the element, reducing content space
Since background color and image appear to the edges of the element, any padding added to an item may have background applied. In the example above, an orange color is added as the item’s background, even in the padded area beyond the text content. The content is moved in equally on all sides because we are applying the same padding all the way around.
A block with top/bottom padding of 5% and left/right padding of 15%.
In the example above, a block has the two different padding values, one for top/bottom, and one for right/left. But you can use different padding to create a different effect or spacing between blocks, rows, columns, etc.
Margin
Think of margin as a personal bubble for an element. Margin is used to set a minimum space outside an element between it’s edges and the edges of other elements.
margin is added outside the element and any border that is applied
Since margin is added outside the edges, background images and colors never apply in this space, because margin is the minimum amount of space around your element.
Controls for margin are are not included in the interface, but margin can be added via custom CSS.
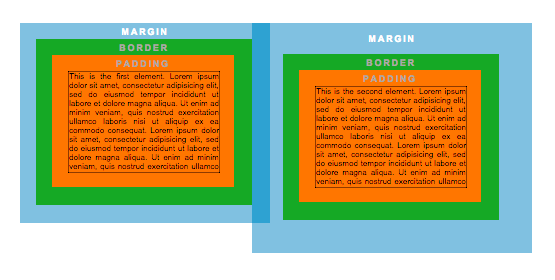
Margin-to-margin behavior
Sometimes, you have two elements beside each other, and both have margin. Since margin is like a personal bubble, it’s the minimum amount of space each element wants around itself. At meeting edges, the greatest margin of the two elements takes priority – margins don’t add together.
margin of right box is greater than the left box
In the example above, the left and right box have margin overlapping, seen where the blue is darkest. You’ll notice the right box has more margin, and like a personal bubble, causes more space between the boxes than the left box requires.
Border
In some of the examples above, border is shown as a thick green line. As you can see, border appears beyond the width of your element. This makes the element appear wider or taller than it’s width or height, so pay attention to the extra space a border may add. You’ll also notice that borders are added before margin is applied.
border is added outside the element, before margin is added
A border may be added to top, right, bottom, or left sides of an element. Not all elements provide control for all four sides of an element, so you might combine the border settings for more than one element to get the desired look.
Border controls
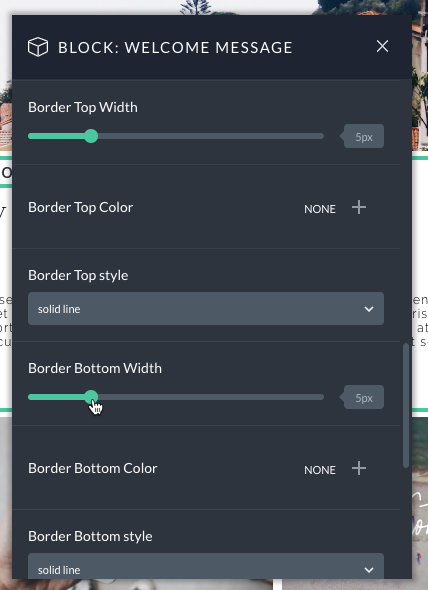
Within blocks, rows and columns, there are three settings for borders, width, color and style. The width setting changes the thickness of the border line. (Remember that the border width is added beyond the size of your element, so it will take up extra space.) Of course, this changes the color of the border. Use color and opacity controls to get just the right effect. And style allows you to change between solid, dashed, dotted, and other line styles. Experiment with different styles for just the right look.