
Everything you see when visiting a page of your site comes from two main aspects of a design:
- Everything in your layout – blocks, rows, columns, and modules setup within ProPhoto
- (optional) Everything in your content module – the portion of your page coming from WordPress (your page/post/gallery contents)
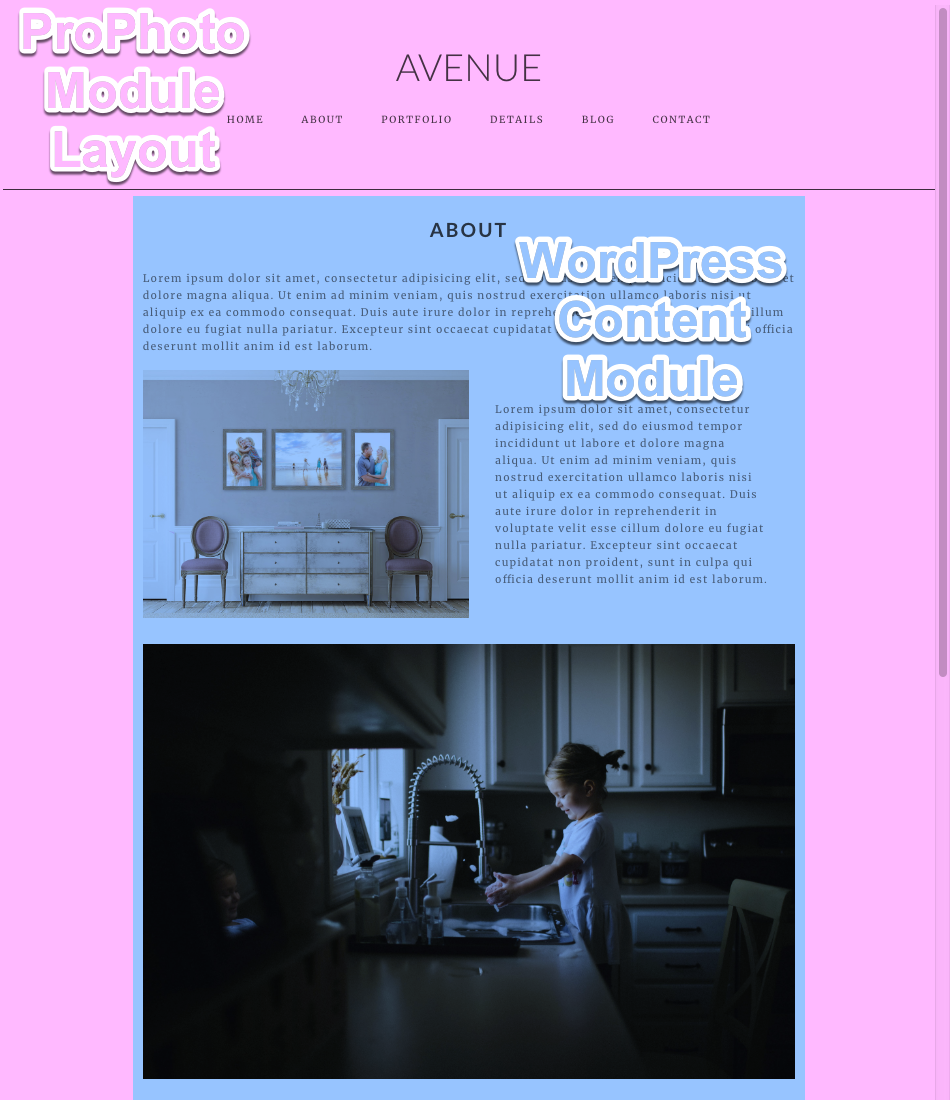
A ProPhoto layout consists of modules for each thing you see … a logo in a Graphic module , your links in a Menu module , etc. In most cases, a WordPress content module appears in a layout so the content you create in WordPress can be shown for your pages, seen in this example:
NOTE: This module is crucial in layouts used for multiple pages of your site—like the default layout—because it shows the unique content of each page. If you see the same content when you visit different pages, your layout might not have the dynamic WordPress content module, and may only have text, gallery, or grid modules which do not change between pages.
As an example, your layout will usually use the WordPress content module to display the images in a gallery page (even though it is also possible to use a gallery module inserted into a special layout). Or when a blog page needs to show posts in a grid format, the excerpts grid feature can be turned on in the WordPress content module settings (see Excerpts on posts pages below). You can change styling of page content, like the font of the title, the publish date, the spacing between images, toggle category & tag lists, and lots of other appearance controls.
Most designs will include this module in a “main content” block in your layout, but you can always add one if a layout doesn’t have this module by default or if you have deleted it by accident.
Add a WordPress content module to your layout
To add the WordPress page/post content in your layout, follow these steps:
- Edit your layout in the Visual Builder
.
Unlock the block where you want to add the WordPress content if it is not already unlocked for editing. - Click to access the Elements > Modules area in your sidebar and locate the “WordPress” module.
- Click to drag-and-drop the module into your layout.
- Click to edit the module’s settings to change fonts, spacing, and lots more. (see the next section)
Here is a demonstration of the steps above:
The WordPress content module is a dynamic module because it will show the contents of any page you view with your layout assigned. This creates a section of your layout which shows your page or post content, along with anything else that you have placed in your layout, such as a navigation menu, footer area, or other layout section.
Change the style of WordPress content
The WordPress content typically includes a title along with the words & images you have placed in your page or post.
The WordPress content module settings give you control over the style of the text, the spacing of images, the header & footer meta info like date, category, and author, among several other settings.
To edit the style applied to the WordPress content in your layout, follow these steps:
- Edit your page layout in the visual builder and locate the WordPress content module controls.
- Click the gear icon to edit the settings for the WordPress content module.
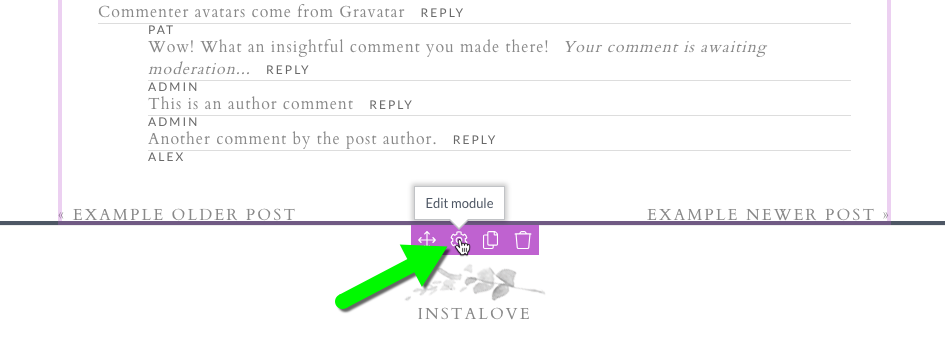
- Use the sections of the WordPress content module popup to change spacing, header styles, content styles, comment styles, and lots of other controls.

There are many controls for the WordPress content module appearance, so please check out the tutorials about changing the style of your pages and posts you’ve created in WordPress by following the links below:


