One of the foundational principles of a responsive site like ProPhoto is to make images load fast.
To achieve this, our software provides smaller versions of your photos when a visitor is using a screen size or device where the original image would be too large and take too long to download. This is often called “image optimization” and you’ll find it built into ProPhoto 7.
You may switch between two different tools which process your photos by visiting the ProPhoto > Settings > Site Settings > Misc > Individual image downsizing area, seen in this video clip:
Your web server might provide both the GD Library (Graphics Draw Library) and the ImageMagick Library for processing photos, or it might only offer one of them.
Image downsizing options
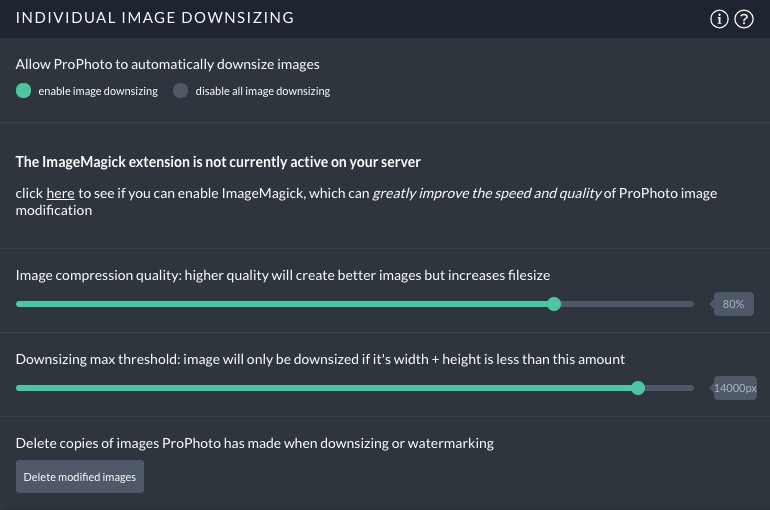
Several options are available in this area – you can enable image downsizing for faster performance across all devices which visit your site.
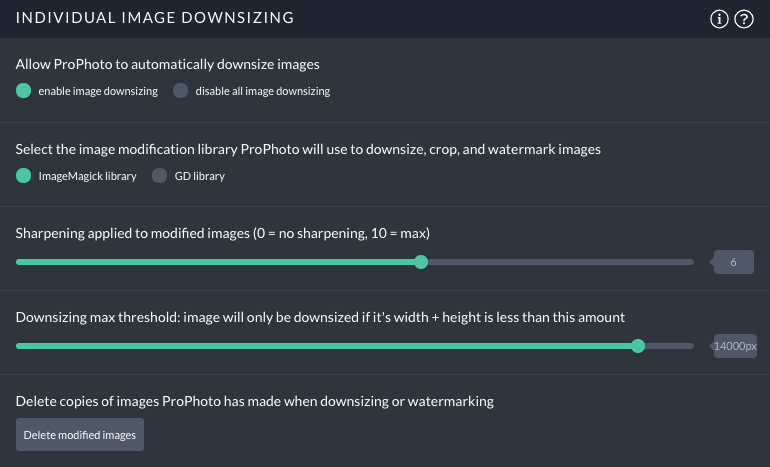
Enable or disable image downsizing
ProPhoto will optimize images that you upload when the page is viewed for the first time. After the first viewing, you and your visitors should notice an improved loading speed because downsized image copies will be available for the pictures in your blog posts, your pages, your photo galleries, and images in your design.
We recommend leaving downsizing enabled for the fastest website speed. You can disable image downsizing if you discover a conflict with caching plugins or other tools you use for optimizing your website, but ProPhoto image downsizing should be compatible with most other tools.
Select the image modification library
You can also select between different image downsizing tools if they are available on your web server, and you can control the amount of post-sharpening applied to downsized images, and you can adjust the threshold for ProPhoto image downsizing to prevent server errors or timeouts. We recommend leaving the max threshold slider as high as possible. If you encounter problems, errors, or timeouts on your web server (rare) you can reduce this slider control to see if the problems are eliminated.
Click to read a brief description of each software library:
GD Library
ImageMagick Library
Image compression quality (GD only)
Reduce your image file size by lowering this slider control. Smaller image file size helps your site load more quickly for all devices, which is a good thing.
You may want to experiment with the value, since smaller quality numbers may make some photos look blotchy or soft.
Sharpening (ImageMagick only)
Images which are downsized to fit different device screens are automatically optimized for file size, and have post-sharpening applied so that downsized image copies look their best. A middle value of 5 or 6 is typically a good balance, leaving images sharp and natural, but you can reduce or increase the sharpening level to your taste.
Imagick changesDelete modified images
After ProPhoto has created optimized copies of your photos, it will not recreate them unless you click to delete the downsized copies.
Your original photos are still available, but the duplicates which are generated at smaller sizes will be cleared.
This can be used to clear some space on your web server, and it is also necessary to delete image copies if you make changes to the quality/sharpness controls mentioned above.