If your setup of ProPhoto can’t autoupdate normally, you will need to periodically download the latest theme zip file from your account page on our site.
You can compare your version of ProPhoto 6 shown at the bottom of every WordPress admin screen with the latest version we list on our ProPhoto 6 Change Log.

use the link below the button when downloading from your account page
When you have the ProPhoto theme zip file, you can choose a workflow:
Update ProPhoto inside WordPress (recommended)
Step 1: Login to WordPress and head to the Themes screen
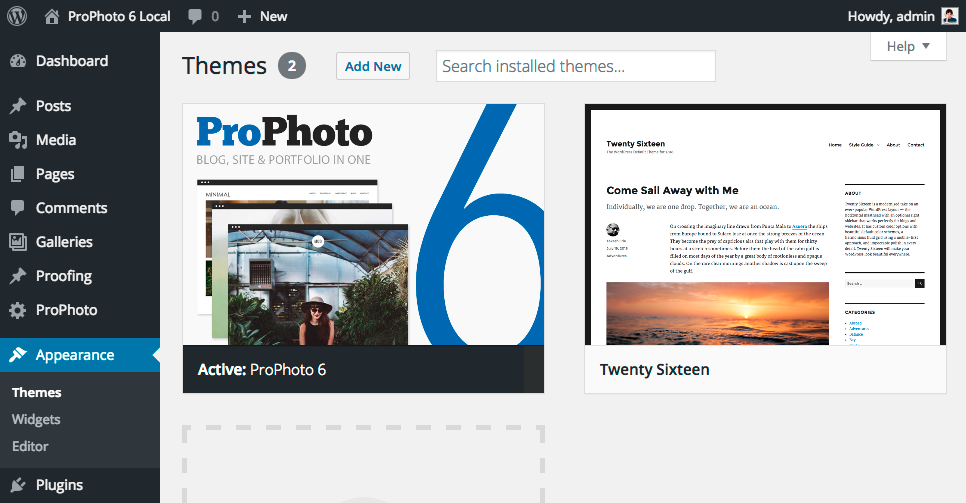
Login to WordPress and find the “Appearance > Themes” screen. You should find ProPhoto in this screen, as your active theme.

Step 2: Activate another theme
Activate any other theme in this screen – it’s only temporary.
If you have no other theme in WordPress, you can install and activate any theme – just click the Add New button to install another theme – such as Twenty Sixteen – and activate it.
Step 3: Delete the old copy of ProPhoto
Delete? Really?! Yes – you’re only removing the ProPhoto software, so all of your customizations and posts and pages and images are all safe in WordPress. After you upload the newer copy of ProPhoto everything will return to normal.
At this point, your site will look like the theme you activated. This is okay – in the next step, you’ll install the newer copy of ProPhoto to bring your site back to it’s proper appearance.
Step 4: Upload and activate ProPhoto
Again, if you don’t have the ProPhoto theme zip file at this point, you can go to your account page and download a copy. Remember, you are not uploading the pp-installer.zip at this point.
Click the Add New button and then the Upload Theme button. You’ll see a file upload box where you can drag-and-drop your zip file from your computer (like the video clip below shows) or you can click to find the file on your computer.
After uploading, click to Activate ProPhoto and you’re done!
If you get stuck at any point, please contact us for guidance, or try one of the other methods below:
Update ProPhoto using your host File Manager
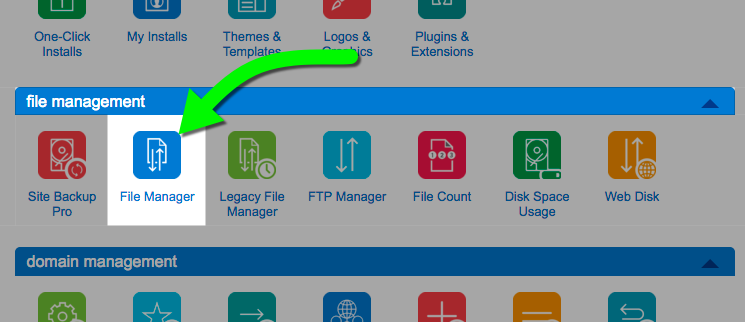
Step 1: Login to your host and find the File Manager tool
Your web hosting company should provide you with a control panel (sometimes called cPanel) where you can manage your hosting account. In this area, a File Manager tool should be available, allowing you to explore and work with your web server file system.

Step 2: Locate your WordPress themes folder
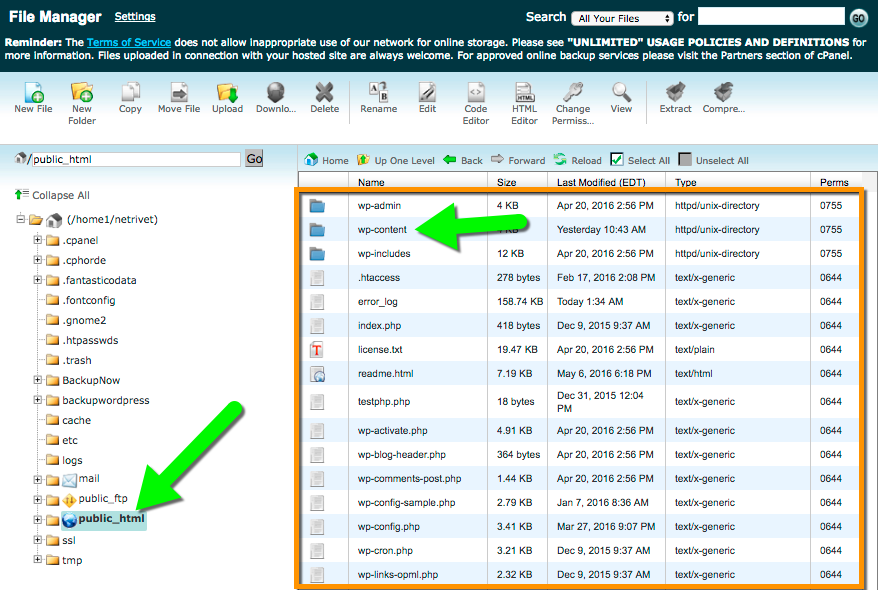
Once you are in your File Manager tool, you should see the file system for your server. On most servers, the main location for website files is a folder called public_html or www or sometimes htdocs. You can ask your hosting company tech support where your website folder is located if you can’t find this yourself.
Inside the website folder, you’ll look for your WordPress files – we’re interested in the wp-content folder for this guide, seen here:

When you find this folder, go inside to find the wp-content > themes folder, where you will see a prophoto6 folder inside.
 When you find this folder, you’ve arrived – proceed to the next step.
If you can’t locate this folder, please contact your hosting company for guidance, or consider reaching our friends at NetCrafted and they can help.
Step 3: Rename your ProPhoto theme folder
Using your File Manger, rename the old prophoto6 folder to something else. Typically, adding an underscore before the folder name works best, such as _prophoto6 so it’s easy to find later at the top of the list.

NOTE: when you rename this folder, your site will no longer be styled by ProPhoto 6, and may look broken briefly, so be sure to continue to the next step right away.
Step 4: Upload your ProPhoto theme
Using the File Manager Upload button, select the zip file you downloaded from your account page and upload it. After uploading, refresh the themes folder to view the zip file.
Click the File Manager Extract button to unzip the file. Refresh the themes folder again to find the ProPhoto folder. This video demonstrates:
After following these steps, your ProPhoto theme should be active and should be working. If it does not appear to be active, login to WordPress and make sure it is selected as your theme, or make sure your test drive mode is enabled.


