
Navigation menus are extremely flexible in ProPhoto. You can create as many menus as you want, and then drag them wherever you’d like into your layout using the Visual Builder.
Create or edit a menu
To create a new menu, go to the Elements area of the Visual Builder, and click on “Menus” in the Libraries section. Create a new menu by clicking the ADD MENU button. Once created, then click the gear icon to edit the menu.
We recommend that you name your new menu in a way that will be helpful for organization purposes. While the menu names aren’t shown anywhere on your site, it’s a good idea to give each one a descriptive name. For example, “Mobile Slideout Menu” is more helpful than “New Menu #2” if you ever need to locate that menu to edit later.
Most designs already include one or more pre-configured menus that you can edit and use, without having to create a new one.
Add a menu item
To add a menu item to your menu, simply click the ADD MENU ITEM button. And then select the link type that you want to use.
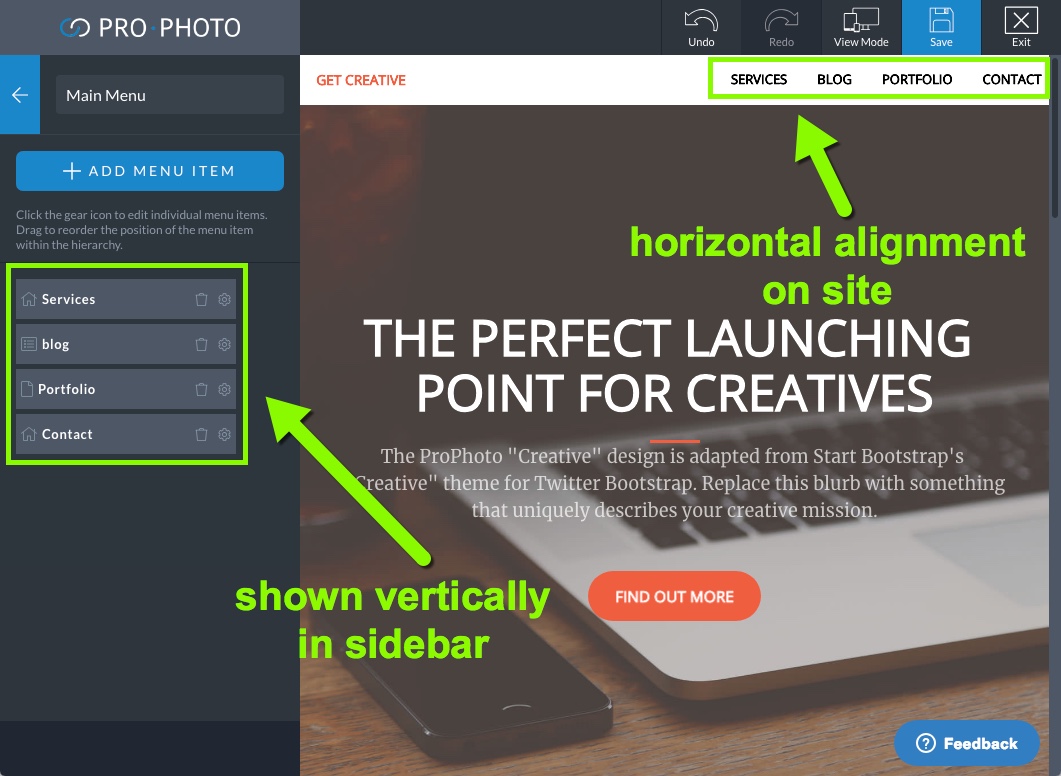
Menu orientation
It should be noted that displaying a menu horizontally will display links left-to-right on the site, corresponding to the top-to-bottom order in the Menu builder screen.
Rename or delete a menu structure
To rename any existing menu structure, just click the gear icon to edit. Type in a new, helpful name for the menu at the top.
To delete any menu structure you no longer need, just click the trash can delete icon.
Create a dropdown
There are two ways to create a dropdown in any menu.
- Use a menu item that has a dropdown inherit in it’s structure – pages, categories dropdown, archives dropdown or recent posts. These items dynamically create the dropdowns.
- Manually create a dropdown by dragging a menu item underneath another, indenting a little bit.
The second option is shown in the video below.


