There are a few ways to add text to your ProPhoto layout, but the most common ways are:
- WordPress content module – shows the content of the WordPress page/post you see in your layout
- text module – individual blocks of text you can put in any part of your layout
The text module makes it easy to add a short bit or a large block of text, and is simple to use. Just click and type:
Add a text module to your layout
To add a text module into part of your layout, follow these steps:
- Edit a layout using the Visual Builder tool.
- Visit the Elements > Modules sidebar to drag-and-drop a text module into any column of your layout.
- Click to place your cursor in the text area to type or paste any text you want.
Align text module content
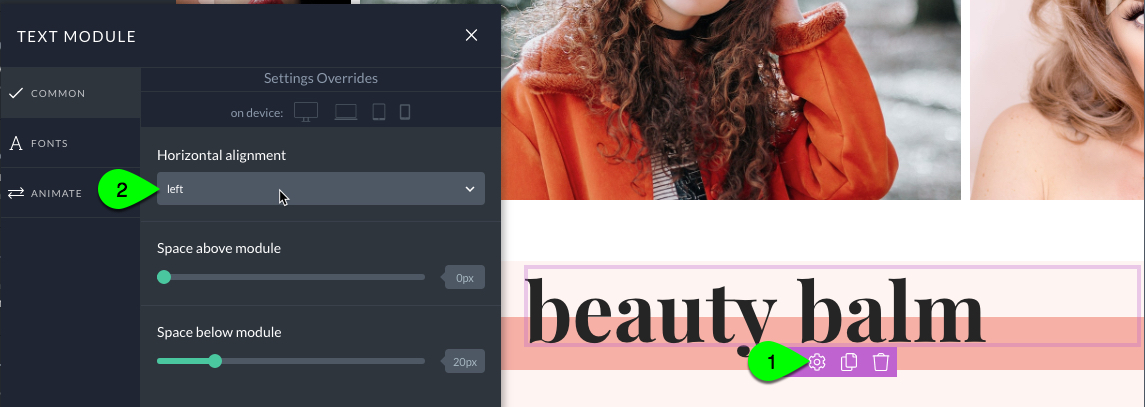
Each module provides a settings popup where you can change alignment. Click the gear and change the alignment within the popup.

As with other settings, the alignment applies to the entire module of text. If you would like to have different alignment for different bits of text, create new modules and alter the alignment of each as needed.
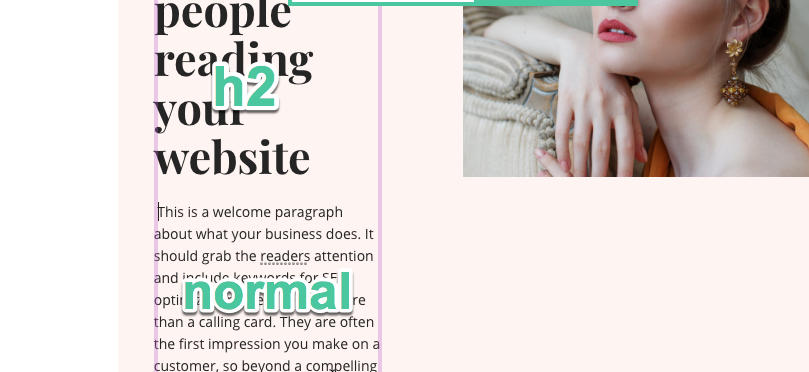
Choosing a text type
When you type in a text module, the “Normal” text type will create text as regular paragraph text. This means that your website will use typical <p></p> tags for your text. But you also have options to choose other heading types to affect the underlying HTML markup. Most types are available from a dropdown, but lists are created using buttons in the toolbar.

Font style of text module content
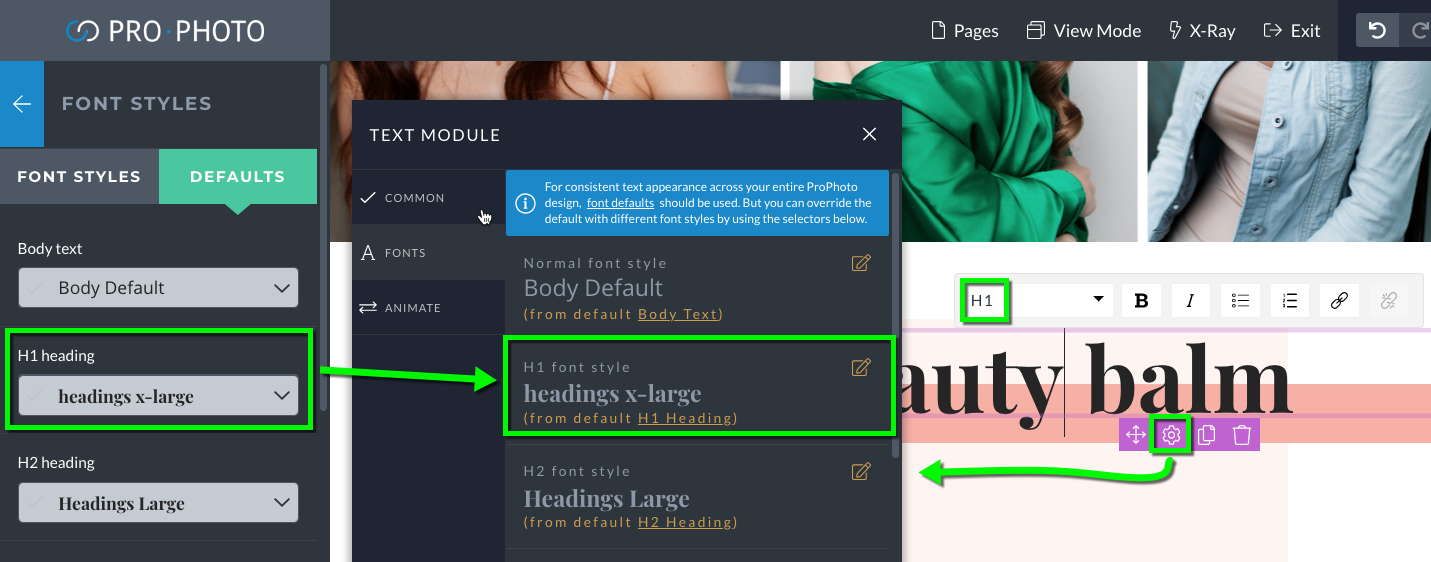
Each module inherits the default font styles (if set) for every text type. These style selections are visible when editing the module. For example, if you set a default style for h1 text in “Font Styles > Defaults” that is the style that will be used when you choose h1 for your text.

If you change the text type, the style of the text will change based on your default settings. If you need to use something other than a default style, click the edit icon to choose an override style. Click the X icon to return to the default. Below is a demonstration showing how to change text types and apply or remove overrides.
In many cases it may be easier to use a new text module for different text types, but you have the option have multiple types in a single module.

Change the text type of specific text by highlighting the text and choosing a type from the dropdown.
If you need to use a variation of a font style you currently have – maybe you need smaller text or different capitalization – you can click to copy an existing font style and create a new version that is applied to the module. (you can reuse that new font style later, too)
See here for a demonstration:
To learn more about working with font styles, please click to read our separate guide about Fonts & text styles for full details.
Create links within text module content
Words or phrases in your text modules can be set to behave as links to other pages or websites.
Highlight some text within your module and click the link button. A dropdown allows you to paste a URL address, and (optionally) choose to have the link open in a new browser window/tab of their browser.
The text will become a link to whatever address you paste or type in. (be sure to use the http:// or https:// at the beginning!)
Since links can have different appearance like color, underline, bold, etc. than the normal text, you can work with the options within your font style to change the appearance of links in your module. To learn more about working with font styles, please click to read our separate guide about Fonts & text styles for full details.
Headings and SEO
When working with a new module, choosing to use a heading of H1, H2, H3, etc. will cause your page to use these tags for the entire content of your text module. You can use this method and add new modules for new heading types. Or, if you prefer you can highlight text and add multiple heading types in the same module. If default fonts are set up for headings then the appearance of the text will change when you change the heading type. But this can be overridden if you want. For example, you might want the default body text to apply to your h3 header in a certain module. You can do that.

Headings communicate to web crawlers the title for a section of your site content. For example, if you have a layout with an about section, you might begin this section with a text module which says “About Me” at the top. You can select the H1 type for your module to signify this is a heading for that part of your page. If you need sub-areas, you can nest sub-headings as H2, H3, and so on.
A note about H1, H2, H3 and SEO
It used to be true that websites needed to use headings in sequence down the page because web crawlers like Google expected the H1 tag to be the most important, top-level title of the page. Using more than one H1 in a website, for example, used to be considered bad SEO practice … back when we were tuning in to The Fresh Prince of Bel-Air and Blossom.
But this is the future. Google is smart and contextual, and no longer expects web pages to use heading tags in a particular order. In fact, the HTML5 spec no longer requires heading tags to appear inside the prior level heading tag as it once did.
SEO concerns with placing heading tags incorrectly and hurting your SEO ranking are long gone, so if you plan to use heading tags in your text modules, try to use them in sequence, but don’t worry too much about it. If you’re overly concerned, you can always start from the H3 tag and go from there.
Remember, ProPhoto automatically optimizes your website for SEO with best practices so extra tagging is generally less crucial, and definitely not as important to have specific unseen tag structures as simply having the proper content in your pages for people to actually read.


