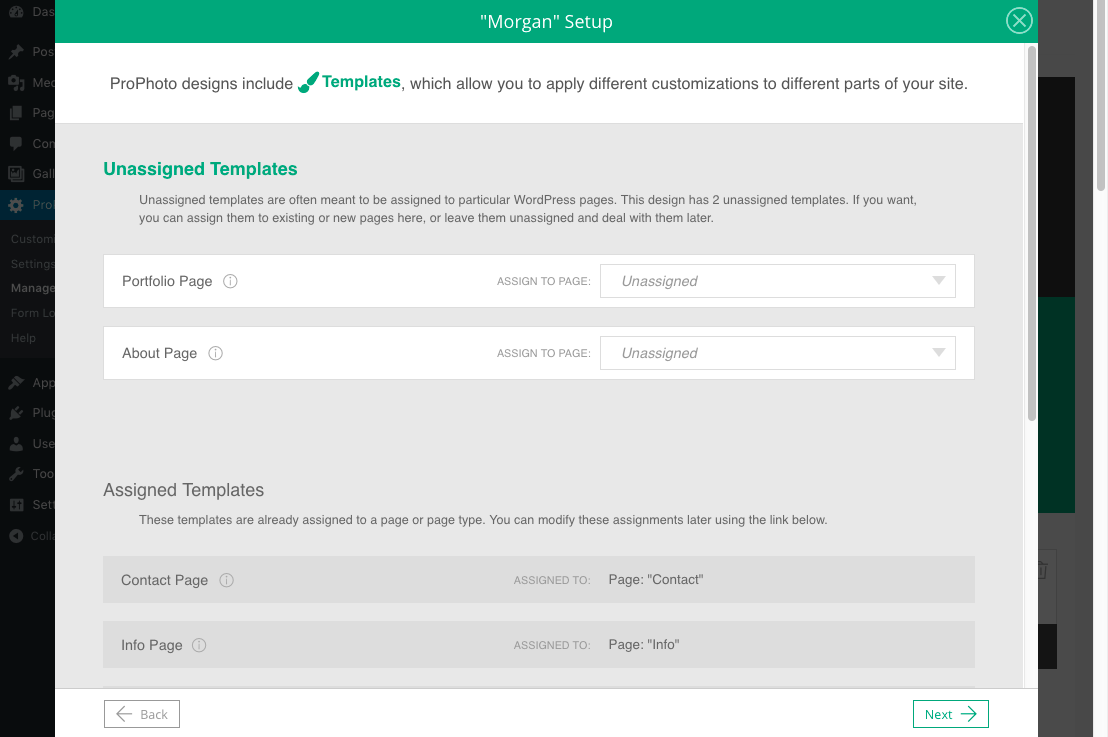
When you first begin customizing a design, you should be presented with a step-by-step on-boarding wizard to help you get started. You can return to the on-boarding wizard any time by clicking the Setup button for your design at the top in your “ProPhoto > Manage Designs” screen, seen in this short video clip:
In the second step, you can choose which templates are assigned to which WordPress pages. You simply choose a page from the dropdown, or you can click to create a new page if you don’t currently have a page to use for the template.

To learn more about this step, and all of the other on-boarding wizard features, see our separate On-boarding Wizard
guide.
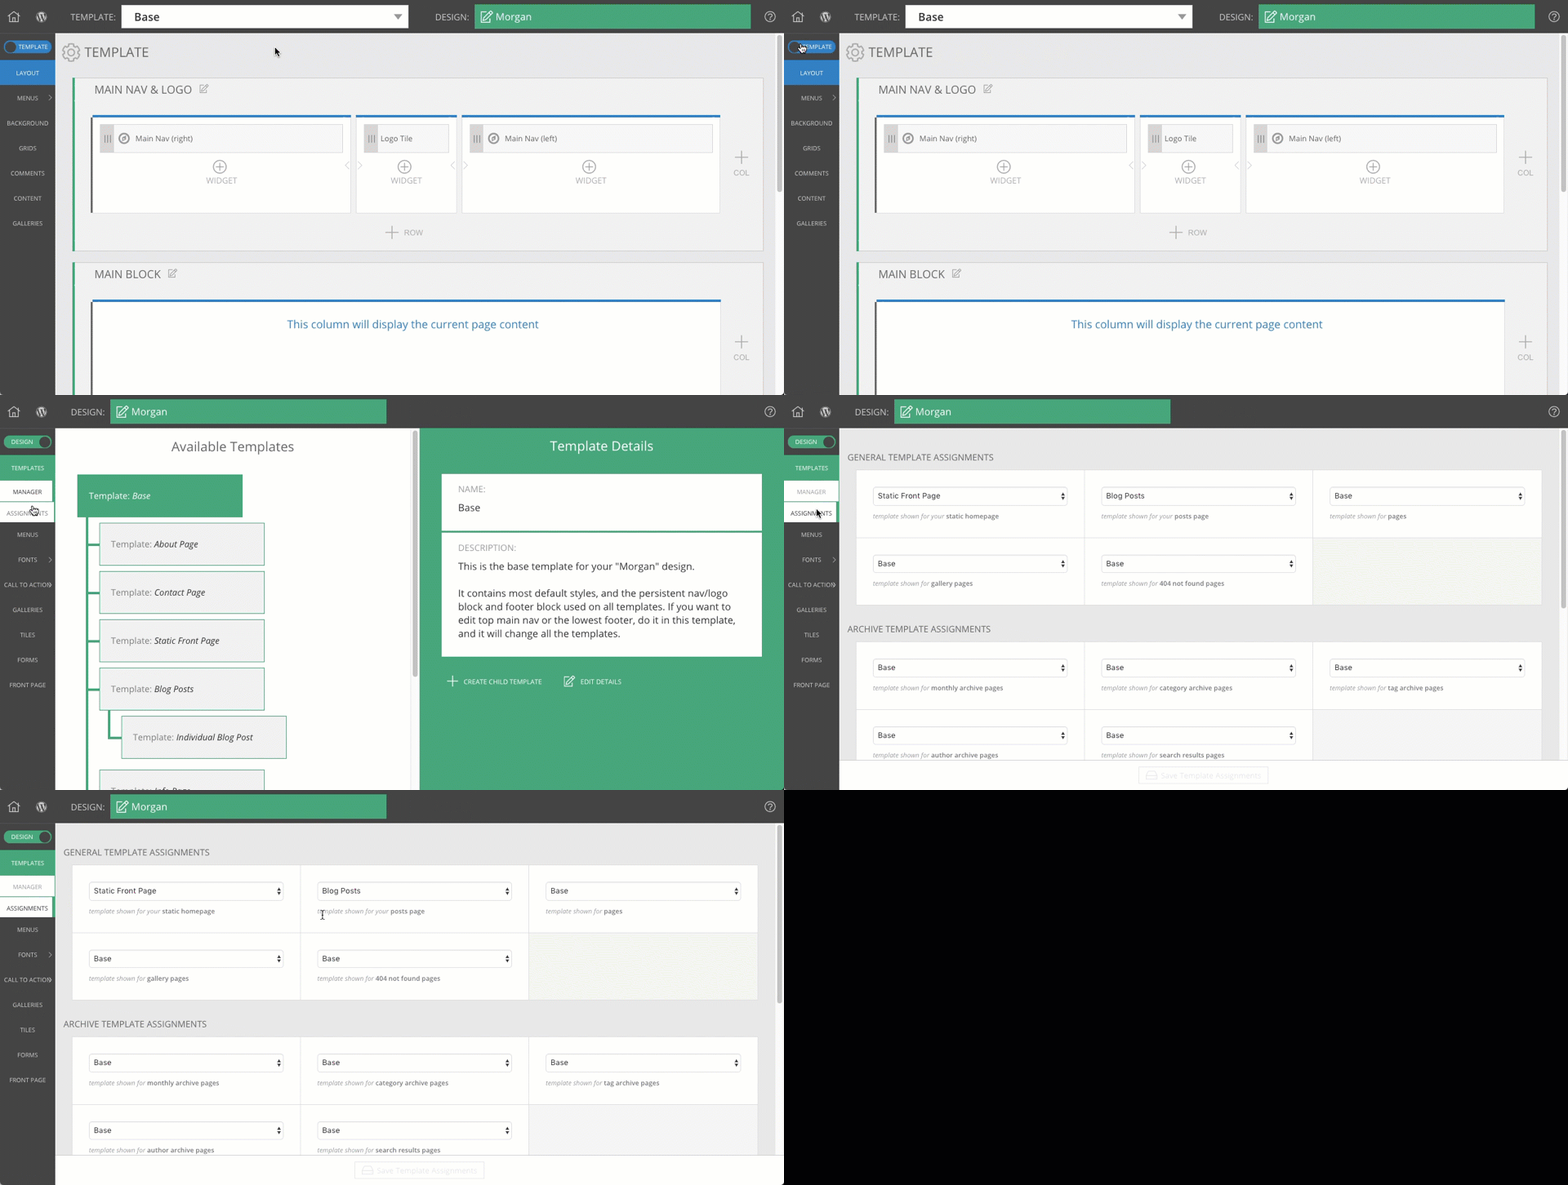
You can apply one template to specific types of pages in the “ProPhoto > Customizer > (toggle top-left switch to “Design”) > Templates > Template Assignments” area, seen in this clip:

Here, you can select a specific template to use for different page types. Simply pick a certain template to use and save your changes.
By creating different templates and assigning them to different page types, you can achieve unique look & layout for different parts of your site. For example, blog page types might have a sidebar column, while other page types do not. You could even create a different layout or appearance for specific categories of your blog.
Page types
There are many page types which accept specific templates in this area, including:
- the static homepage (if you have one; see the Set up a static front page
guide)
- each page of your blog (not individual posts)
- each web page (every page you create in WordPress)
- each gallery page type (ProPhoto galleries, accessed directly)
- the 404 ‘not found’ page (when visitors try to load an address that doesn’t exist)
- special blog pages, like:
- monthly archive pages
- category pages
- tag pages
- author posts pages
- search results page
- individual blog posts
- specific blog category pages
- all Proofing galleries pages*
- individual Proofing galleries*
- specific Proofing category pages*
- other page types created by plugins†
* these are only available when the separate Proofing plugin is installed
† not all WordPress plugins which create custom post types may work with this feature
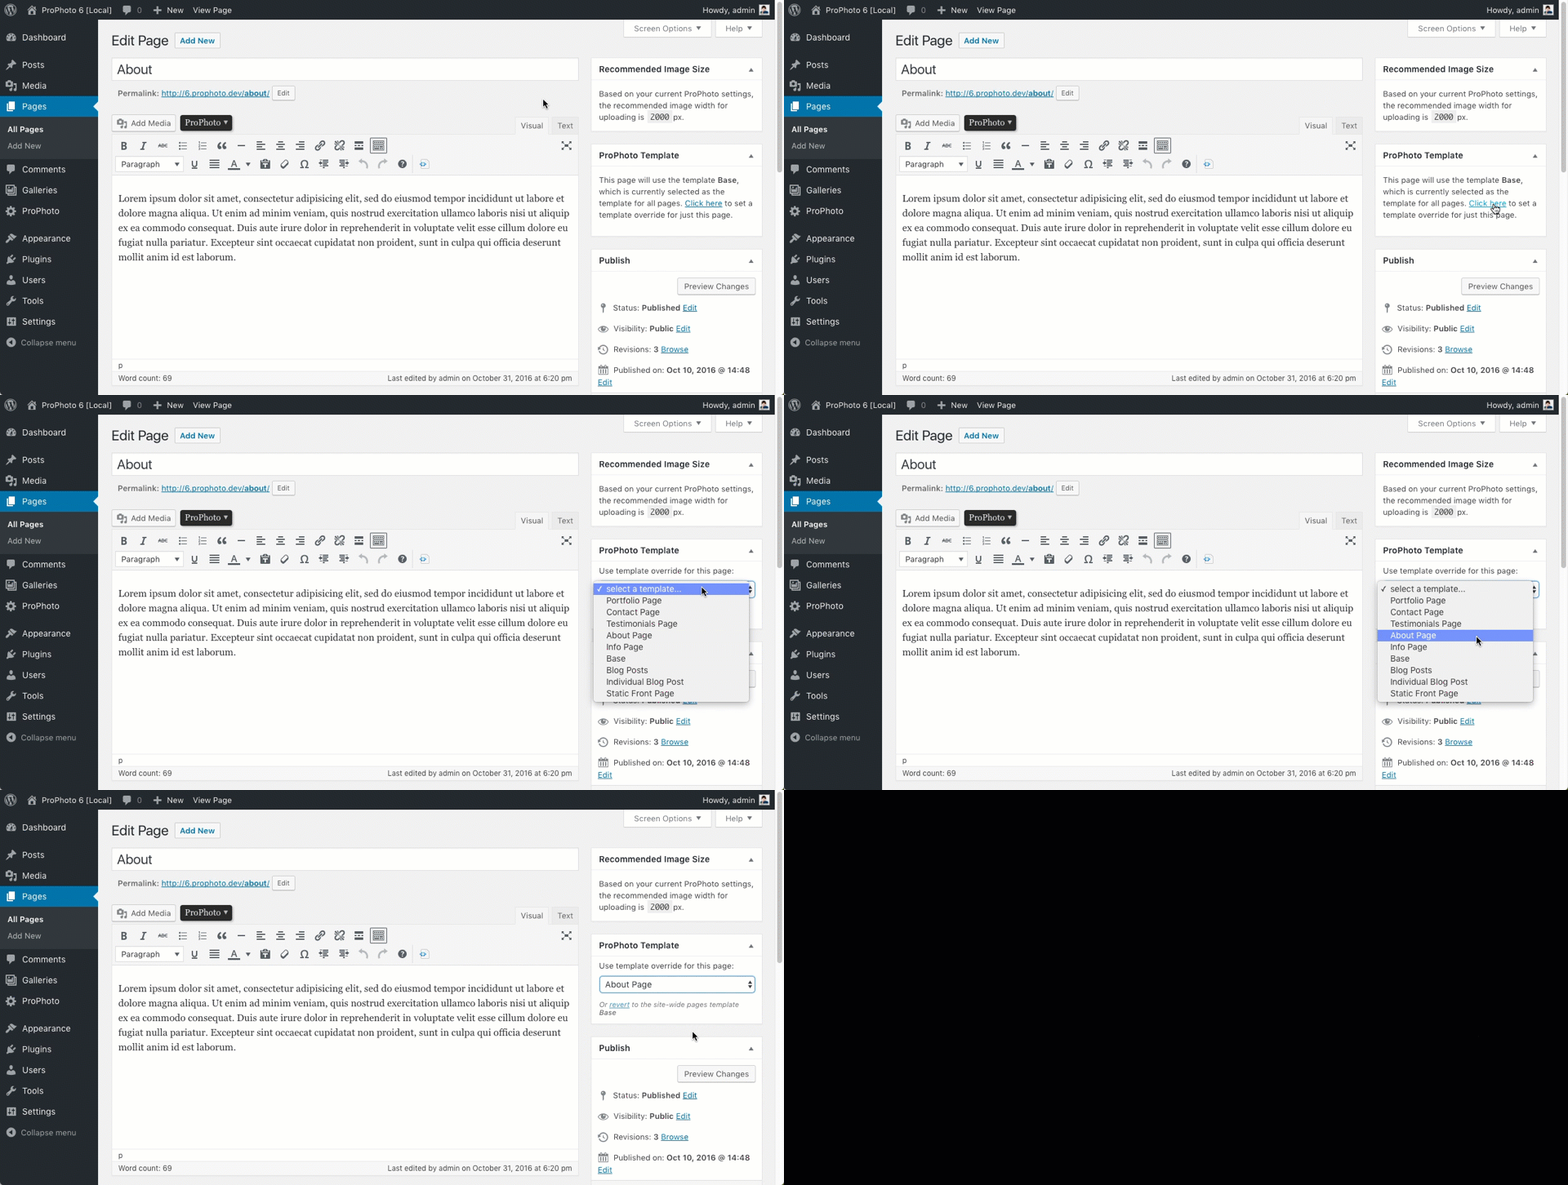
You can apply one template to a specific page in the normal WordPress page editor, seen in this clip:

When editing a page look for the “ProPhoto Template” option box. The template your design uses for individual web pages will be used by default, but you can select any specific template you’ve created in ProPhoto.
Some designs make use of templates to create the content seen on the page. In many of these cases, the content of your WordPress page will not be used at all – you can hide all the page content by checking the box found in your page editor screen. See our Hide title or content area of a post/page
guide for details.


