
Past ProPhoto versions, like ProPhoto 4 and 5, were able to import designs from the previous versions such that the site looked almost exactly the same in the new version. With ProPhoto 6, because of how vastly different it is, a design import from a previous ProPhoto version is not an option. Version 6 is a complete rebuild of the theme from the ground up.
As such, if you have a site up and running already, you likely won’t want to simply activate ProPhoto 6 and have your unfinished work visible to the world. Instead you will use our “test drive” plugin to make it possible for administrators to work on the ProPhoto 6 site and see it on the front end while all others still see the previous design. Our installer plugin sets up this plugin automatically.
Does anything import?
Yes! When ProPhoto 6 is activated, the design settings don’t import but some of the proprietary ProPhoto content does convert to a corresponding ProPhoto 6 version.
ProPhoto 4 and 5
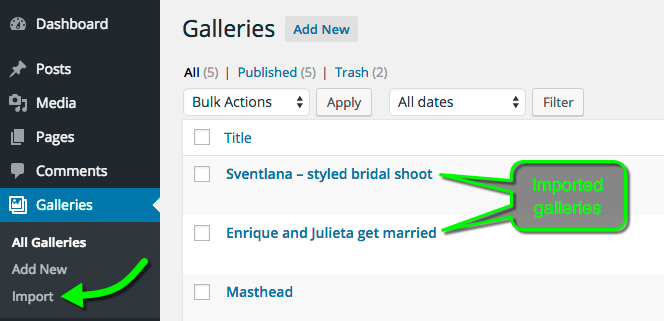
- Galleries import to “ProPhoto > Customizer > Galleries” and receive the default gallery style. You are presented with the option to import them when ProPhoto 6 is activated, but you can also manually import them.
ProPhoto 5 only
- Some content area grids will convert to ProPhoto 6 grids and be present in the post/pages where they were created.
- Menus from “ProPhoto > Customize > Menus” in the P5 interface will convert to P6 menu structures in “ProPhoto > Customizer > Menus > Menu Structure”.
Can I recreate my P4 or P5 design using P6?
Yes… sort of. Because ProPhoto 6 is a responsive site and not fixed width, there will never be a way to get your design looking exactly the way it did before. But that’s actually a good thing! With ProPhoto 6, your site design will smartly respond to changing browser window sizes. You may want to translate the overall look and feel of your previous theme to the new ProPhoto 6 responsive environment. If that is you, check out some of our general tips below.
Header area
You’ll have to toss out what you know about a ProPhoto header. No longer is there a logo to upload, a special “masthead” area or a menu that can only display from the header. Your header consists of whatever you choose to be at the top of your layout. Your layout is built entirely of various widget types.
For example, if you want to replicate the look of a stacked logo, menu and masthead you would use a graphics widget, a menu widget and a gallery widget.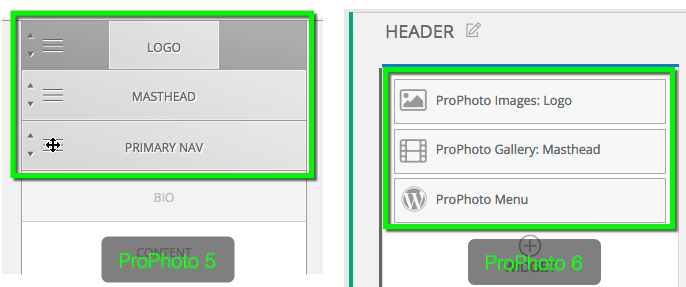
Logo
Menus
Masthead
Bio area / Footer
There is no special bio or footer area in ProPhoto 6. There is no need for one. You should be able to replicate what you were doing with widgets in either of these areas with widgets in one of your template layouts. For the bio area add a row or a block below your new “header”. Then add columns and widgets. Drag the divider between columns to proportion how much space a column gets. For the footer, arrange your widgets at the bottom of the layout.
For labeling purposes, it can be helpful to use use a block layout entity for these areas because you can label it. In the image below you see an example of a simple 1 row/4 column footer with a widget in each column. 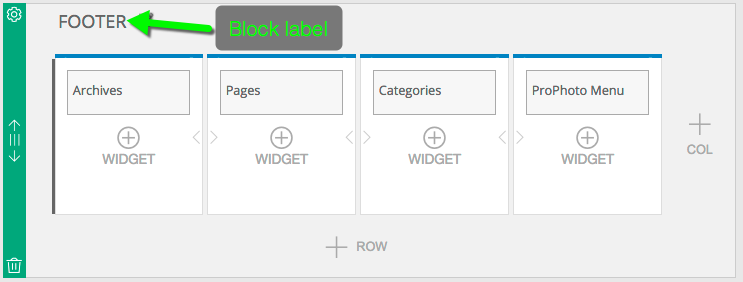
Sidebar
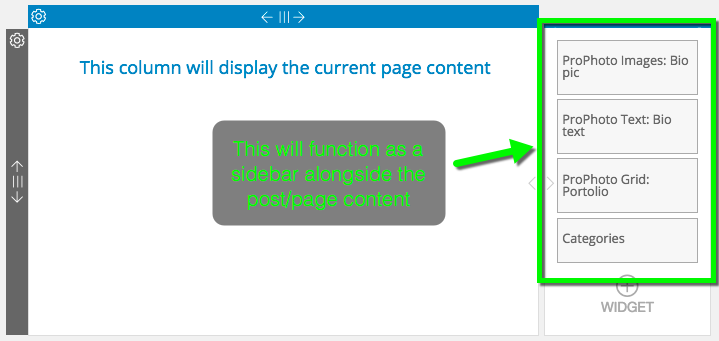
Recreating your sidebar is similar to recreating the other areas in that it involves placing widgets in “ProPhoto > Customizer > Layout”. However, there are a few things to be aware of. When in the layout area you’ll notice a column with the message, “This column will display the current page content.” That is a visual indicator of where your post page content will display, relative to your widgets. So if you had a sidebar that ran the entire height of the content pages on your site, you would add a column to this row and fill it with your sidebar widgets.
 If you want a sidebar that goes all the way from top to bottom then make sure that all your rows have a column on the same side that occupies the same number of spans.
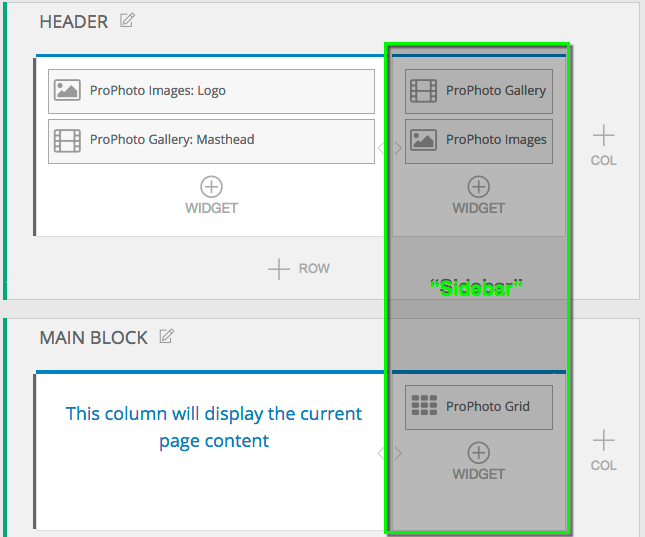
Sliding sidebar drawers
The tabs that can slide out from your site that were a feature in previous ProPhoto versions are not currently an option with ProPhoto 6. To replicate that functionality you would need to look for a plugin that offers something like that.
Font/text style
In ProPhoto 6 we have consolidated where you make changes to your font styles. Instead of hunting down specific font override options all over the interface, you build every font style that you want to use in “ProPhoto > Customizer > Fonts”. That list of font styles is available for selection everywhere you can choose a style. 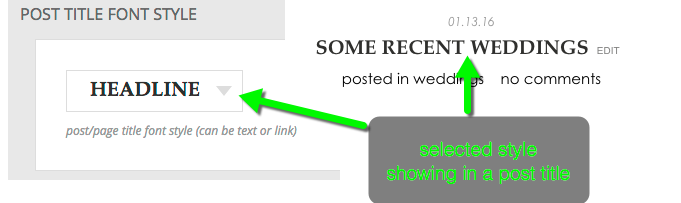
Layout changes on specific pages or page types
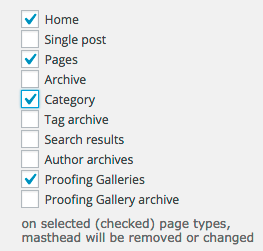
ProPhoto 5 masthead display options
If your old ProPhoto design had certain elements (bio, footer, logo, menu, for example) disabled or enabled only on certain page types, you can replicate that in ProPhoto 6. But the method you use will be completely different. Instead of checkboxes in the interface or when editing a post or page, child templates are used to create special layouts that can be applied to specific pages or page types. This is a major concept in ProPhoto 6 that worth learning about. Start with our Designs & Templates
guide.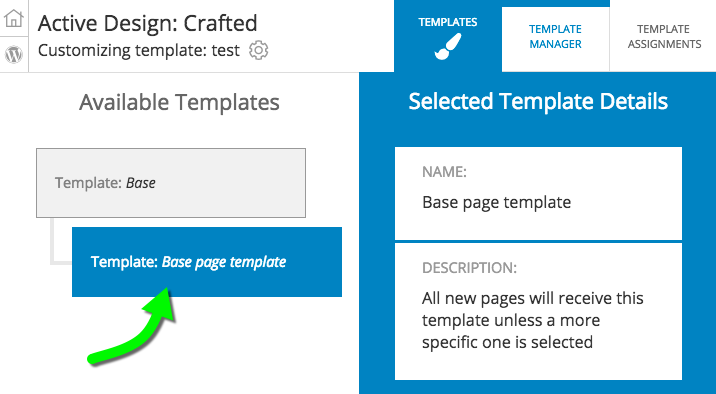
For example, if you want a menu at the top of your landing page but don’t want it on any other pages, you add the menu to your main template where you want it. Then you create a child template in which you delete that menu. Finally, you apply that child template to a page type or a specific page.


